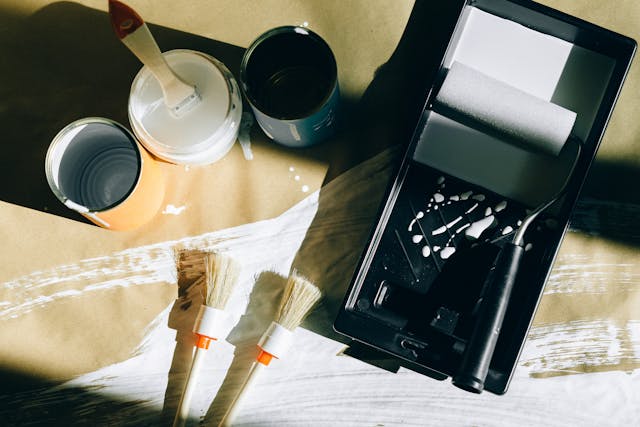
When you plan to customize your walls or furniture during a renovation project, it is common to use resin paint. Compared to most paints, it stands out for its finish that is both modern and smooth. To bring a touch of brightness to your interiors, this product offers you better results, whether in a warm and welcoming living room, a lovely bedroom, or the kitchen.
Versatile, it can be applied on a variety of materials. Whether you use it on wood, metal, concrete, or even tiles, it is the ideal paint to highlight them. To go further on the subject, we invite you to discover this article providing more information about resin paint.
Overview: For me, resin paint is the magic wand of the rushed renovator. I consider it the ultimate solution to give a second life to dated surfaces without engaging in costly and dusty demolition work. In my opinion, its strength lies in its incredible adhesion on difficult supports such as tiles or melamine. It is, in my view, a strong editorial choice for those who prioritize immediate aesthetics and durability: provided that the preparation phase, which guarantees the film’s longevity, is never neglected.
What is resin paint and what are its advantages?
Most people already know what is meant by paint, but the notion of resin seems rather unclear and vague. It is a product that indicates a substance composed of synthetic and natural fibers in solid or semi-solid form.
Unlike natural resins, synthetic resins result from the synthesis of hydrocarbons. They are notably used in the production of paint. Although they are also used in the manufacture of inks, perfumes, mastics, and adhesives, it is in the field of paint that they are most often encountered.
Simply put, resin constitutes a binder that dissolves more easily in alcohol or many other special solvents. It offers a paint film that is particularly resistant, solid, and hard. It has the capacity to be opacifying, covering, and filling.
When you hear about glossy, acrylic, or alkyd paint, know that these are resins present in paints. Let us recall that the latter are composed of pigments, fillers, additives, a thinner or solvent, and of course resin. It ensures the main properties of the paint.
If resin paint is widely used during renovation work, it is because it presents many interesting advantages. Not only is it easy to apply, but it also provides better durability, beautifully enhancing any type of support.
What types of surfaces can be covered with resin paint?
Whatever its appearance, hardened or fluid, resin paint can be applied on different surfaces. Thanks to its versatility, it is a product widely used in construction as well as renovation. It provides the support with a shiny effect and makes it non-slip.
This type of paint is compatible with a variety of materials such as plastic, concrete, tiles, wood, and even metal. Thus, it is possible to use it to arrange a lovely terrace, to renovate walls, or to modernize floors.
In most cases, it is epoxy resin paint that is widely used on concrete floors. It serves not only to enhance them but especially to protect them. As a result, even though these are high-traffic areas, the product increases their wear resistance. Its use also makes them semi-glossy, which facilitates cleaning.
If you use it on tiles, know that the resin gives them a touch of novelty. It is mainly used to makeover a floor covering or wall tiles during bathroom or kitchen renovation.
On wood, epoxy resin provides excellent adhesion. It is generally used as a protective finish. It enhances the material’s durability to resist moisture, UV rays, sunlight, and more. For use on metal, the product increases its tolerance to weather conditions.
I remember wanting to transform my old kitchen with dark oak fronts without changing a single piece of furniture. I chose a satin gray epoxy resin. The realization happened during the application of the second coat: the room’s light completely changed, turning from a stifling space into a modern and bright kitchen. This project taught me a fundamental lesson: success does not depend on the brushstroke, but on the meticulous degreasing with acetone I had done the day before. Without this unpleasant step, my beautiful project would have peeled off in a few weeks.
Types of surfaces compatible with resin paint
As mentioned above, resin paint can be applied to a wide variety of materials. The table below summarizes its use on various supports with their advantages and limitations :
| Surface | Necessary preparation | Advantages of use | Disadvantages |
|---|---|---|---|
| Tiles | Cleaning and degreasing | Good adhesion, smooth finish | May require several coats |
| Wood | Light sanding | Enhances waterproofing | May be sensitive to shocks |
| Metal | Degreasing and primer | Weather resistant | Requires careful preparation |
| Concrete | Cleaning, filling cracks | Durable, protects the surface | Sensitive to moisture if poorly applied |
How to apply resin paint on tiles?
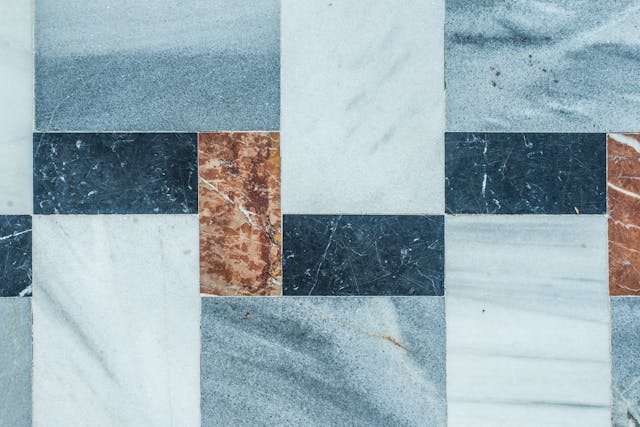
Over time, it has become clear that tiled floors, walls, backsplashes, and countertops require specific maintenance. They can scratch easily, and wear is often inevitable. To refresh them, a few coats of resin paint can be enough to makeover them.
Epoxy resin is most often used due to its wide range of colors with pigments added to the solution. It appeals to most because of its thick nature and resistance. Before applying it, the surface must be well prepared for a better final result.
Start by cleaning it. Gently degrease it with denatured alcohol or a dry solvent like acetone. Do not hesitate to pay particular attention to the joints. If these are poorly prepared, it is sometimes the cause of early finish degradation. That said, sand the tiles with fine sandpaper.
As soon as the preparation is finished, you can apply the primer with a brush or a roller. This product can be applied on any type of dry, sound, clean, and hard surface. Once this first coat has dried, it is time to apply the resin on the tiles. It is preferable to use a drip-free roller while spreading the product evenly.
Steps for applying resin paint on tiles
To simplify your reading on the different phases of applying resin on tiles, we suggest you refer to this table. It is designed to summarize the essential information to know.
| Step | Description | Necessary tools |
|---|---|---|
| Cleaning | Remove dirt and degrease | Sponge, degreasing product |
| Light sanding | Make the surface rough | Fine sandpaper |
| Application of the primer | Apply a bonding primer | Roller, brush |
| Application of the resin | Spread the resin evenly | Drip-free roller, brush |
What are the advantages and disadvantages of resin paint compared to other paints?
For those looking for a durable and cost-effective solution to improve and protect a surface, resin paint will suit them perfectly. It is a specially formulated coat designed to offer many advantages compared to traditional paint. It is no surprise that it is becoming an increasingly popular choice for both residential and industrial applications.
Many favor it because of its great versatility. With its ultra-smooth finish, you can use it on wood, tiles, plastic, metal, concrete, or composite materials. It can also be used for multiple purposes.
If you want to protect the surface from wear, moisture, UV rays, or shocks, resin paint demonstrates remarkable resistance to provide you with exceptional results.
It is also the best product to restore shine to a worn surface. It gives it a glossy and smooth appearance to modernize its look. With its wide range of colors, you just have to let your imagination run free to beautifully decorate the surface. See below the major advantages of resin paint:
- Resistance to shocks and wear
- Smooth and modern finish
- Resistance to moisture
- Application on various materials
As for the disadvantages, it must be said that some models of resin paint are criticized for their high costs, especially epoxy resin. If you call on a professional for its application, the cost of their service can also be expensive.
Performance guide for resin paint
| Type of resin | Recommended surface | Shock resistance | Drying time (complete) |
| Epoxy Resin | Floors, worktops | Maximum | 7 days |
| Polyurethane Resin | Furniture, backsplashes | High | 48 to 72 hours |
| Specialized Acrylic Resin | Wet walls, tiles | Medium | 24 hours |
| Finishing varnish | Additional protection | Enhances durability | 24 hours |
What is the lifespan of a resin paint once applied?
The lifespan of this product, once applied to the surface, mainly depends on the quality of the resin used, the application, and the conditions of use. In general, it can protect and dress the surface for decades. If you have regularly taken care of it, a resin can last about 20 years.
Epoxy resins seem more fragile when exposed to UV rays. On the other hand, polyurethane resins have no issues with ultraviolet radiation. Therefore, it is recommended to read the technical data sheets of each paint at purchase and choose the right one based on its intended use and specific characteristics.
To increase its durability, please repeatedly maintain the surface covered with resin paint. To do this, regularly dust it off. For cleaning, avoid using harsh or overly acidic products that could damage the characteristic shine of the resin. Likewise, bare brush brooms should be avoided.
In the presence of stubborn food stains, do not use the scrubbing side of a sponge, as this will scratch the surface. You can simply rub them with a soft, damp cloth. Do not stop until the dirt disappears.
Is it possible to apply resin paint yourself or should you call a professional?

Of course, it is entirely possible to take care of it yourself, provided you have some knowledge of painting and have all the necessary tools and equipment for the job. In any case, there is nothing better than entrusting this task to an expert.
With their knowledge and experience, an experienced painter promises you professional-quality work. Since they are well-equipped, they can work quite quickly with incomparable results, helping you save time.
During the preparation of the surface, a professional does not just clean it but also takes care of its restoration. Before mixing the paint with the hardener, they effectively protect themselves with personal protective equipment since some resins are toxic products.
As a specialist, they respect the drying time between coats according to the manufacturer’s instructions. After applying the resin paint, they do not hesitate to provide valuable advice to the owner for proper use of the surface.
What are the essential preparations before applying resin paint?
If you want to achieve excellent results in applying resin paint, prioritize the various preparations. First, the surface must be ultra-clean. Do not hesitate to remove all impurities using acetone or a solvent. Then wipe it with a cloth.
Make sure the surface is completely dry for better adhesion. If necessary, you can use a hot air gun. Once the moisture is completely removed, sand the surface with abrasive paper to remove all irregularities. After that, dust it off to prepare it for the adhesion of the resin paint.
The use of a primer is necessary for optimal product adhesion. For this, simply follow the same process as for applying wall paint. Do not forget to respect the drying time before applying the resin paint itself. Take the opportunity to prepare all the tools needed for the application.
- Deep cleaning of the surface
- Use of a primer
- Respecting drying times
- Preparation of necessary tools
How many coats of resin paint are needed for a good finish?
Generally, two or three coats of resin may be enough to provide a pleasing final appearance. Drying time plays a crucial role in the finish. If you do not respect this duration, you risk ruining all the work. It is recommended to wait at least 24 hours between each application.
The first relates to the application of the paint undercoat. It mainly serves as an adhesion layer for the resin. Even better, it helps to hide imperfections, make the surface opaque, and less porous.
As soon as this product is completely dry, you apply the first coat of resin paint. It often fills the hollows of the floor or walls and covers marks that the undercoat fails to mask. After applying the first coat, you may sometimes notice roller or brush marks. To get rid of them, you can lightly sand the surface with fine-grit sandpaper. Once done, don’t forget to dust off the surface.
Once the drying time is properly respected, do not hesitate to apply the second finishing coat. Its main function is to even out the surface. Brush marks, stains, and hollows should be completely gone.
If you want an even shinier finish, you can apply the third coat of resin paint. Please carefully respect the drying time between each coat to avoid ruining your work.
What is the average cost of a renovation project with resin paint in 2026?
The price of this type of project varies depending on the surface to be renovated. It is found that painting a small concrete balcony can cost less. On the other hand, painting on a wooden surface proves expensive even though the application lasts only one or two days.
The renovation cost also depends on the type of resin used. If you choose an epoxy paint, the price for the supply alone ranges from 5 to 20 euros per square meter. Renovation with a polyurethane paint is more affordable at 4 to 9 euros per square meter. The same applies to gloss paint. It is offered between 5 to 9 euros per square meter excluding labor and surface preparation work.
If you plan to entrust the renovation project to a qualified painter, please prepare between 15 to 50 euros per square meter. This price depends on the service to be performed.
Cost comparison for a resin paint project
To help you choose the project that fits your budget, take the time to consult this table summarizing the estimated cost with the renovation to consider.
| Type of project | Surface to renovate | Estimated cost (€/m²) | Project duration |
|---|---|---|---|
| Tiling renovation | Bathroom, kitchen | 20 to 50 €/m² | 1 to 3 days |
| Painting on concrete | Garage floors, balcony | 15 to 40 €/m² | 2 to 4 days |
| Painting on wood | Furniture, worktop | 30 to 60 €/m² | 1 to 2 days |
What are common mistakes to avoid when applying resin paint?
The first common mistake concerns not respecting the waiting time between layers of resin paint. As a result, many problems arise, such as air bubbles, texture inconsistencies, and especially lack of adhesion.
It should be known that drying too quickly affects the gloss and clarity of the final finish. It is advisable to patiently wait the appropriate time allowing each layer to dry properly. This information is often displayed in the user manual at the time of product purchase.
More and more people also make mistakes when mixing the resin paint and the hardener. As a result, the resin does not harden and more hardener must be added to the product. Please carry this out according to best practices to avoid having to fix the situation later.
Using resin paint for effective renovation: Your questions
Sanding is not always mandatory with modern high-adhesion resins, but it is highly recommended. A light sanding helps to break the gloss of the tiles and create a mechanical grip. However, the most important step remains degreasing: any residue of lime or grease will prevent the resin from properly adhering to the surface.
Yes: but only on the express condition of choosing a resin certified for food contact. Once the resin is fully dry and cured (often after a week), it becomes completely inert. However, it is recommended to use a cutting board to avoid scratching the protective film with knives, which could compromise the coating’s waterproofing.
Maintenance should be done gently to preserve the gloss or satin finish. Abrasive sponges and overly aggressive chemical products such as pure bleach or solvents must be avoided. A simple cleaning with soapy water or a neutral pH product is more than enough to keep your surface clean and shiny for several years.
Many favor it because of its great versatility. With its ultra-smooth finish, you can use it on wood, tiles, plastic, metal, concrete, or composite materials. It can also be used for multiple purposes.
If you want to protect the surface from wear, moisture, UV rays, or shocks, resin paint demonstrates remarkable resistance to provide you with exceptional results.
It is also the best product to restore shine to a worn surface. It gives it a glossy and smooth appearance to modernize its look. With its wide range of colors, you just have to let your imagination run free to beautifully decorate the surface. See below the major advantages of resin paint:
- Resistance to shocks and wear
- Smooth and modern finish
- Resistance to moisture
- Application on various materials
As for the disadvantages, it must be said that some models of resin paint are criticized for their high costs, especially epoxy resin. If you call on a professional for its application, the cost of their service can also be expensive.
Performance guide for resin paint
| Type of resin | Recommended surface | Shock resistance | Drying time (complete) |
| Epoxy Resin | Floors, worktops | Maximum | 7 days |
| Polyurethane Resin | Furniture, backsplashes | High | 48 to 72 hours |
| Specialized Acrylic Resin | Wet walls, tiles | Medium | 24 hours |
| Finishing varnish | Additional protection | Enhances durability | 24 hours |
What is the lifespan of a resin paint once applied?
The lifespan of this product, once applied to the surface, mainly depends on the quality of the resin used, the application, and the conditions of use. In general, it can protect and dress the surface for decades. If you have regularly taken care of it, a resin can last about 20 years.
Epoxy resins seem more fragile when exposed to UV rays. On the other hand, polyurethane resins have no issues with ultraviolet radiation. Therefore, it is recommended to read the technical data sheets of each paint at purchase and choose the right one based on its intended use and specific characteristics.
To increase its durability, please repeatedly maintain the surface covered with resin paint. To do this, regularly dust it off. For cleaning, avoid using harsh or overly acidic products that could damage the characteristic shine of the resin. Likewise, bare brush brooms should be avoided.
In the presence of stubborn food stains, do not use the scrubbing side of a sponge, as this will scratch the surface. You can simply rub them with a soft, damp cloth. Do not stop until the dirt disappears.
Is it possible to apply resin paint yourself or should you call a professional?
Of course, it is entirely possible to take care of it yourself, provided you have some knowledge of painting and have all the necessary tools and equipment for the job. In any case, there is nothing better than entrusting this task to an expert.
With their knowledge and experience, an experienced painter promises you professional-quality work. Since they are well-equipped, they can work quite quickly with incomparable results, helping you save time.
During the preparation of the surface, a professional does not just clean it but also takes care of its restoration. Before mixing the paint with the hardener, they effectively protect themselves with personal protective equipment since some resins are toxic products.
As a specialist, they respect the drying time between coats according to the manufacturer’s instructions. After applying the resin paint, they do not hesitate to provide valuable advice to the owner for proper use of the surface.
What are the essential preparations before applying resin paint?
If you want to achieve excellent results in applying resin paint, prioritize the various preparations. First, the surface must be ultra-clean. Do not hesitate to remove all impurities using acetone or a solvent. Then wipe it with a cloth.
Make sure the surface is completely dry for better adhesion. If necessary, you can use a hot air gun. Once the moisture is completely removed, sand the surface with abrasive paper to remove all irregularities. After that, dust it off to prepare it for the adhesion of the resin paint.
The use of a primer is necessary for optimal product adhesion. For this, simply follow the same process as for applying wall paint. Do not forget to respect the drying time before applying the resin paint itself. Take the opportunity to prepare all the tools needed for the application.
- Deep cleaning of the surface
- Use of a primer
- Respecting drying times
- Preparation of necessary tools
How many coats of resin paint are needed for a good finish?
Generally, two or three coats of resin may be enough to provide a pleasing final appearance. Drying time plays a crucial role in the finish. If you do not respect this duration, you risk ruining all the work. It is recommended to wait at least 24 hours between each application.
The first relates to the application of the paint undercoat. It mainly serves as an adhesion layer for the resin. Even better, it helps to hide imperfections, make the surface opaque, and less porous.
As soon as this product is completely dry, you apply the first coat of resin paint. It often fills the hollows of the floor or walls and covers marks that the undercoat fails to mask. After applying the first coat, you may sometimes notice roller or brush marks. To get rid of them, you can lightly sand the surface with fine-grit sandpaper. Once done, don’t forget to dust off the surface.
Once the drying time is properly respected, do not hesitate to apply the second finishing coat. Its main function is to even out the surface. Brush marks, stains, and hollows should be completely gone.
If you want an even shinier finish, you can apply the third coat of resin paint. Please carefully respect the drying time between each coat to avoid ruining your work.
What is the average cost of a renovation project with resin paint in 2026?
The price of this type of project varies depending on the surface to be renovated. It is found that painting a small concrete balcony can cost less. On the other hand, painting on a wooden surface proves expensive even though the application lasts only one or two days.
The renovation cost also depends on the type of resin used. If you choose an epoxy paint, the price for the supply alone ranges from 5 to 20 euros per square meter. Renovation with a polyurethane paint is more affordable at 4 to 9 euros per square meter. The same applies to gloss paint. It is offered between 5 to 9 euros per square meter excluding labor and surface preparation work.
If you plan to entrust the renovation project to a qualified painter, please prepare between 15 to 50 euros per square meter. This price depends on the service to be performed.
Cost comparison for a resin paint project
To help you choose the project that fits your budget, take the time to consult this table summarizing the estimated cost with the renovation to consider.
| Type of project | Surface to renovate | Estimated cost (€/m²) | Project duration |
|---|---|---|---|
| Tiling renovation | Bathroom, kitchen | 20 to 50 €/m² | 1 to 3 days |
| Painting on concrete | Garage floors, balcony | 15 to 40 €/m² | 2 to 4 days |
| Painting on wood | Furniture, worktop | 30 to 60 €/m² | 1 to 2 days |
What are common mistakes to avoid when applying resin paint?
The first common mistake concerns not respecting the waiting time between layers of resin paint. As a result, many problems arise, such as air bubbles, texture inconsistencies, and especially lack of adhesion.
It should be known that drying too quickly affects the gloss and clarity of the final finish. It is advisable to patiently wait the appropriate time allowing each layer to dry properly. This information is often displayed in the user manual at the time of product purchase.
More and more people also make mistakes when mixing the resin paint and the hardener. As a result, the resin does not harden and more hardener must be added to the product. Please carry this out according to best practices to avoid having to fix the situation later.
Using resin paint for effective renovation: Your questions
Sanding is not always mandatory with modern high-adhesion resins, but it is highly recommended. A light sanding helps to break the gloss of the tiles and create a mechanical grip. However, the most important step remains degreasing: any residue of lime or grease will prevent the resin from properly adhering to the surface.
Yes: but only on the express condition of choosing a resin certified for food contact. Once the resin is fully dry and cured (often after a week), it becomes completely inert. However, it is recommended to use a cutting board to avoid scratching the protective film with knives, which could compromise the coating’s waterproofing.
Maintenance should be done gently to preserve the gloss or satin finish. Abrasive sponges and overly aggressive chemical products such as pure bleach or solvents must be avoided. A simple cleaning with soapy water or a neutral pH product is more than enough to keep your surface clean and shiny for several years.