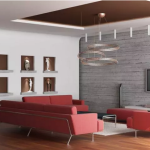
You have finished setting up your warm and welcoming living room. This time, you plan to proceed with the bathroom renovation for more functionality and comfort, but above all to enhance your home.
Between waxed concrete, PVC or tiles, resin is a very popular material nowadays. It helps you carry out various types of work to modernize your bathroom. Versatile, it can be applied both on floors and walls, giving a fresh look to your interiors. If you want to learn more about the subject, this article provides important information about this material.
Expert summary: In my opinion, resin is the boldest and most effective solution to transform a bathroom without undertaking heavy demolition work. I consider it the only material capable of offering a seamless surface, without joints, which is a major hygienic advantage in a wet room. In my view, the success of the project depends 90% on the thoroughness of the preliminary cleaning: resin does not forgive any soap or lime residue. It is an editorial choice that I highly recommend to modernize a “vintage” atmosphere in the blink of an eye.
What is resin and why use it for a bathroom?
Resin can be defined as a base material used to compose countless objects such as textiles, perfumes, adhesives, varnishes, fashion accessories, and paint.
This substance can be synthetic or natural, yellow, translucent, or transparent in color. It differs by its pasty property allowing it to be a perfect binder that solidifies after drying. It is soluble in alcohol but does not dissolve in water.
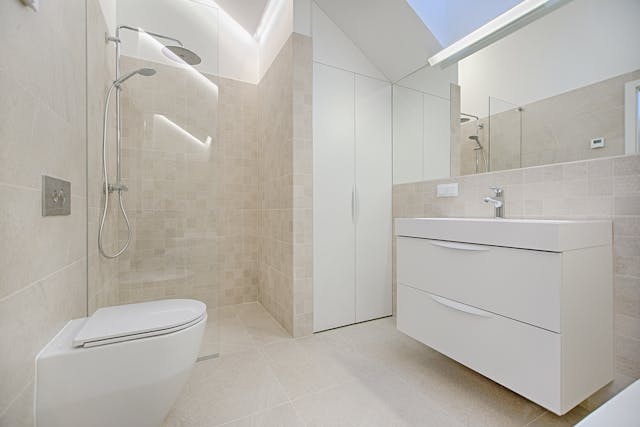
Its use is common in bathroom renovation, thanks to its specific properties. Although it is a small room in the house, the bathroom presents several constraints complicating its layout. Among the most well-known, it is almost always humid. Therefore, a material that withstands this condition must be used.
Resin is one of them. It has a high tolerance to humidity. Moreover, it helps prevent mold formation and condensation. Since the bathroom is one of the most used rooms in the house, resin paint such as polyurethane resin and epoxy resin is very resistant and durable over time. It withstands intensive use.
I tried to renovate my enameled bathtub with a specific polyurethane resin after much hesitation. The realization was radical at drying time: the smooth and shiny appearance instantly erased ten years of wear and scratches. However, I quickly learned that a “resin-coated” bathroom requires a new relationship with objects: I had to give up my overly acidic cleaning products in favor of gentle solutions. This experience taught me that resin is not just a paint, it is a new coating that radically changes the brightness of the room but requires careful care to remain flawless.
What are the advantages of resin compared to other bathroom renovation materials?
Compared to most renovation elements, resin enjoys immense success due to its strong resistance to moisture. Not only is it waterproof, but it also does not risk deforming upon contact with water. This makes it a better choice for the zen, Scandinavian, and modern bathroom where humidity dominates. There is no need to worry about water leaks or splashes damaging the floor covering. This material tolerates these phenomena without any problem.
Unlike other materials, resin is also easy to use. Epoxy resin generally does not require the application of a primer. This renovation element is suitable for several types of surfaces such as bathtubs, tiles, showers, hard plastics, sinks, and bathroom furniture. It comes in a wide variety of colors to suit everyone’s tastes. That is why resin is ideal for renovating the wet room.
It is also a very covering material. It can be used to fill cracks. It provides an elegant finish to your floor or wall. That is why the resin surface is pleasant to look at. Since the material makes it smooth and shiny, it prevents stains from embedding. It is no surprise that it is easy to maintain. Furthermore, it resists very well the chemical cleaning products commonly used in the bathroom.
Comparison of resin with other materials for the bathroom
The table below helps you choose between the most popular renovation materials on the market:
| Material | Moisture Resistance | Durability | Ease of Maintenance | Cost |
|---|---|---|---|---|
| Resin | Very high | Very durable | Very easy | Moderate to high |
| Tile | High | Durable | Easy | Moderate |
| Waxed concrete | Medium to high | Good | Moderately easy | High |
| PVC | Medium | Less durable | Very easy | Economical |
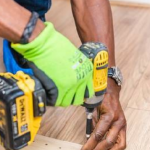
How to apply resin on bathroom walls and floors?
To ensure the longevity of the work, you must start by preparing the surface receiving the resin. If it is in poor condition, everything will only last for a short time. So make sure the substrate is clean, sound, and flat.
Repair irregularities, otherwise, the roughness can be seen through. If necessary, do not hesitate to sand. Also fill all holes and cracks. If the surface does not appear even, it must be leveled by performing a skim coat. And do not forget to clean it since dust prevents the resin from adhering.
Before application, it is necessary to protect the worksite. To do this, cover the parts that are not concerned with masking tape and a tarp. Now mix the resin with the hardener and stir until you obtain a homogeneous mixture.
Before applying the resin, apply a primer or adhesion primer. Although this step is not required, it greatly improves the final result. Once done, apply the first coat of resin with a lacquer roller. After drying, you can add a second coat and proceed to finishing.
It is strongly recommended to wait a few days before reusing the bathroom. Likewise, arm yourself with patience before using cleaning products on the surface.
Steps to apply resin in a bathroom
See below the different steps to follow to properly apply resin in the bathroom. If you follow them to the letter, you will surely be surprised by the quality of the work.
| Step | Description | Necessary tools |
|---|---|---|
| Surface preparation | Clean and sand the surfaces to be treated | Sponge, fine sandpaper |
| Application of the primer | Apply a coat of primer | Roller, brush |
| Mixing the resin | Prepare the resin according to instructions | Mixer, container |
| Application of the resin | Spread the resin evenly | Roller, brush |
What types of surfaces can be covered with resin in a bathroom?
Among the main advantages of resin, its versatility appeals to many people. Unlike other renovation products, it is suitable for a wide range of substrates. You can use it on tiles, cement, earthenware, plaster, concrete, plastic, composite materials, and even wood.
That’s not all, resin is also suitable for several types of metals such as stainless steel, aluminum, and iron. If you want to improve bathroom furniture, it can offer excellent results. Whether laminated or melamine, the furniture can look like new again. Besides that, it can be used to renovate shower trays, sinks, cast iron bathtubs, washbasins, and much more.
In any case, resin is prized for its ease of application. The process is much simpler than installing any wall or floor covering. Apart from these surfaces, it can also be used on countertops and ceilings.
What are the main advantages of resin for waterproofing in a bathroom?
Waterproofing is absolutely essential in a bathroom. A waterproofing problem can cause long-term damage such as the appearance of mold on walls, water infiltration, and in extreme cases, structural damage. Resin is a better waterproofing solution widely used by both individuals and professionals.
It has countless beneficial properties, especially high resistance to UV light, chemicals, possible impacts, and also humidity. That is why it has become a very popular choice during bathroom renovation.
Despite the splashes and drops of water that are very common in the bathroom, resin suffers no damage. Even if you clean it every day, it remains intact. Its smooth structure prevents dirt buildup.
Thanks to its flexibility, it is less likely to peel off or crack despite shocks or floor movements. As detailed above, resin adheres well to countless surfaces. You can choose the color, pattern, and texture of the resin floor or wall according to your tastes.
Another significant advantage is its easy maintenance. Moreover, it is one of the durable renovation materials. The only condition to enjoy it for a very long time is to apply it properly to prevent air bubbles. Here are some major advantages of resin:
- Resistance to humidity
- Smooth and aesthetic finish
- Ease of maintenance
- Adaptation to different surfaces
Is resin suitable for a shower or bathtub?
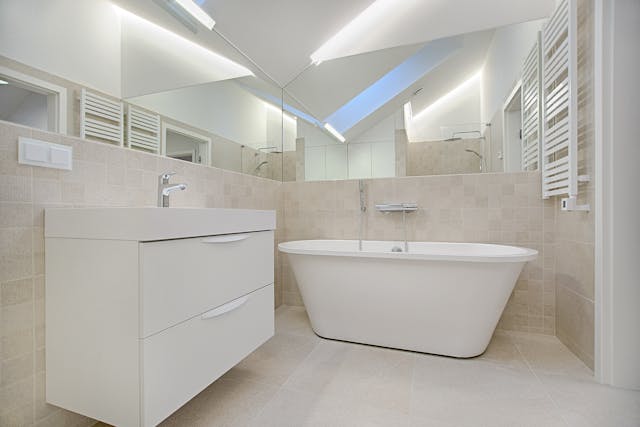
If you want to update your bathtub or shower, don’t hesitate to use resin. It can bring them elegance while highlighting their contemporary and sleek aesthetics. It gives a beautiful look to your shower, especially if you want to give it a modern style.
It should be noted that there are several types of resins suitable for the bathroom. This gives you a wide choice depending on your tastes. You can thus prioritize the color and finish that match your desires.
Before applying resin on your shower or bathtub, you must first prepare them by dismantling, cleaning, and degreasing them. After dusting, you mix the resin and apply it in a thin layer on the surface. After each layer, you must let it dry. It is important to specify that resin can also be spread on sinks, washbasins, and tiled walls.
What are the essential tools for applying resin in a bathroom?
The use of resin is common in the bathroom. To achieve an excellent finish, make sure to equip yourself with the best tools to ensure its application is done properly. During the preparation of the surface, you need a sponge and fine sandpaper. The latter helps you sand it by removing irregularities.
Before mixing resin, don’t forget to wear personal protective equipment since this product can be toxic. Also, cover the bottom of the wall with protective tape to avoid splashes.
Regarding the mixing of resin, you must first pour it into a paint tray then stir it properly. Add the hardener and keep stirring until the mixture becomes homogeneous. If the surface to cover is large, it is more practical to use an electric mixer. Otherwise, a flat spatula is necessary to mix the resin by hand.
As for its application on the surface, a drip-free roller is the perfect tool to spread it evenly. For more comfort, it is preferable to use a telescopic handle. This helps you avoid bending over during work. For details, it is better to use a brush. Below, find a list of tools to gather to ensure the correct application of resin:
- Drip-free roller for even application
- Brushes for details
- Mixer to prepare the resin
- Sandpaper to sand the surface
What are the potential drawbacks of resin in a bathroom?
Of course, the floor, furniture, and resin wall offer several advantages. However, it is necessary to consider its negative points before choosing this material to see if it suits your needs or not.
No one can deny that resin is not only easy to apply but also easy to maintain. However, it can deteriorate over time due to a strong impact. Thus, as soon as a hole or crack forms, you can fix them with a resin as a patch. However, it must be admitted that the result is not very aesthetic. Consequently, it is imperative to prepare a new layer of resin to correct these imperfections.
With its countless advantages, more and more people are attracted to resin. Nevertheless, its high price deters most. This renovation material is not affordable for everyone. Mr. and Mrs. Everyone therefore cannot benefit from its various advantages.
If you also choose epoxy resin, know that its use is limited. It is not compatible with underfloor heating. It must be said that this product is sensitive to temperature variation. You must therefore opt for another type of resin such as polyurethane resin.
What is the average cost to renovate a bathroom with resin?
As we mentioned in the previous paragraph, resin can be expensive compared to most coverings. In any case, it is worth the money considering its multiple strengths.
If you plan to hire a professional, the price per square meter for installation in the bathroom ranges between 40 to 100 euros. This can vary depending on the type of resin used, the region, labor costs, the surface to be covered, the difficulty of access to the site, and many other factors.
To renovate your bathroom floor with resin, you should budget between 40 to 80 euros per square meter. For bathtub or shower walls, plan 30 to 60 euros per square meter. It is noted that the purchase and installation price of polyurethane resin is higher compared to epoxy resin. In any case, please make your choice based on your expectations and requirements before determining the budget.
Cost comparison for renovating a bathroom
Before starting the renovation of your bathroom, it is essential to carefully compare costs, project duration, and the surface to be improved. This helps you make a good decision about carrying out your project.
| Type of renovation | Surface to renovate | Estimated cost (€/m²) | Project duration |
|---|---|---|---|
| Resin on floor | Entire bathroom floor | 40 to 80 €/m² | 2 to 4 days |
| Resin on walls | Shower, bathtub walls | 30 to 60 €/m² | 1 to 3 days |
| Tiling | Walls and floors | 20 to 50 €/m² | 3 to 5 days |
What are common mistakes to avoid when using resin in a bathroom?
Even though applying resin is child’s play, it is still necessary to have technical knowledge to avoid making a blunder. In most cases, people often tend not to follow the manufacturer’s recommendations. As a result, they do not get the expected results. Each brand may note slightly different instructions in the product’s user manual. This must be taken into account for the project’s success.
Some people also make mistakes when mixing the resin and hardener. As a result, they get an uneven finish that disappoints them greatly. To avoid this situation, make sure to mix them well so that the resin hardens properly.
The common mistake people sometimes make is not prioritizing the temperature when mixing the resin. If the temperature is too cold, it takes a long time to harden properly. In very hot conditions, it hardens too quickly, risking breaking all at once. To ensure a constant temperature, it is advisable to use an air conditioner or a heater. The device effectively regulates the temperature of the workspace.
Renovating a bathroom with resin: the complete 2026 guide
Yes, this is one of the great advantages of renovation resin. It is designed to coat the entire surface: joints included. This creates a very modern “monoblock” effect and, above all, eliminates the problems of joints that blacken or crumble over time, greatly facilitating daily cleaning.
For a shower area: it is imperative to use a professional quality two-component epoxy or polyurethane resin. These products create a completely waterproof barrier. However, care must be taken to ensure the drainage slope is correct to avoid prolonged stagnation which, over time, could dull the gloss of the finishing varnish.
If a heavy impact causes a chip: it is not necessary to redo the entire bathroom. There are specific touch-up kits available. It is advisable to lightly sand the area, degrease it, and apply a small amount of resin with a fine brush. After complete drying, applying a touch of finishing varnish will make the repair almost invisible.