Although wood pyrography is not a new technique, many people continue to practice it to this day. This technique aims to stimulate your creativity.
| Steps | Description |
|---|---|
| 1. Prepare the surface | Choose a light, dry, and sanded wood for a better finish. Avoid varnished or treated woods. |
| 2. Set up and heat the tool | Plug in the pyrography pen and wait for it to reach the ideal temperature (usually 5 to 10 minutes). |
| 3. Trace the design | Draw the design with a pencil on the wood or use a stencil for more precision. |
| 4. Pyrograph the wood | Run the hot tip over the outline applying light and steady pressure. Move slowly to avoid excessive burning. |
| 5. Finish and protect | Once the work is done, let the pyrography pen cool down, then optionally apply varnish or oil to protect the wood. |
It allows you to draw patterns, shapes, or letters generally on a wood surface. To carry it out successfully, you need an instrument called a pyrography pen. It is important to provide its definition before getting to the heart of the matter.
The essentials to remember: I consider pyrography as a form of creative meditation where the wood becomes a living parchment. In my view, success does not depend on your drawing talent, but on your ability to control heat and pressure. I find it to be one of the rare creative hobbies that offers total sensory satisfaction: the smell of burnt wood and the crackling of the tip on the grain create a unique experience. To me, it is an art of patience: you must learn to dance with the grain of the wood rather than trying to tame it by force.
What is a pyrography pen?
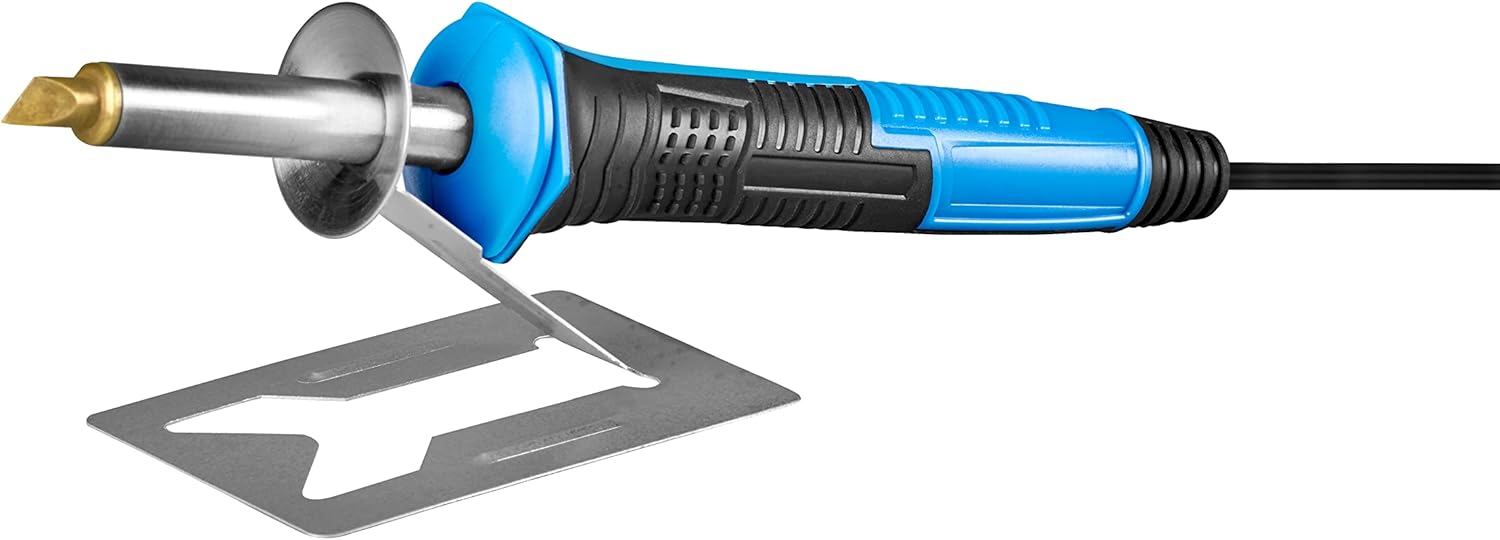
The pyrography pen looks like a soldering iron. It is equipped with a handle and a tube accompanied by one or more tips used for pyrography.
The pyrography kit varies depending on the brand or models. Generally, the tips are made of brass. They come in various shapes and you choose them according to the type of application.
To create your drawing, the tip of the soldering iron pyrography pen will be heated to a temperature of 200 °C. You then apply it to the wood surface.

Thanks to the burn mark, you can create countless original creations. Even though wood pyrography or wood carving is not only for professionals, it is important to master some basic rules. Discover in the next section how to use a pyrography pen according to the rules of art.
During my first attempt on a pine board that was too resinous, I had a real awakening about the importance of the support. I pressed like a madman to mark the wood, which only generated thick smoke and irregular lines. The day I tested a piece of linden wood with a well-heated tip and a light gesture, I understood that the pyrography pen should simply skim the surface. It was a revelation: in woodworking, we often force the material; in pyrography, we listen to it. This experience taught me that heat does 90% of the work: the rest is just a matter of breath and regularity of movement.
Tips for Engraving with a Pyrography Pen
You have just acquired the best pyrography pen and with free delivery, you get the pyrography kit soldering iron. To create a pattern, shape, or artistic drawing, here are the steps to follow:
Gather the Necessary Tools
Apart from the pyrography pen of course, there are some tools to help you produce unique graphic effects on a wood, leather, or other material support.
You will need carbon paper or tracing paper, a drawing to trace on the wood piece or model, a pencil, an eraser, a ruler, a chisel, pliers, and a compass.
If you plan to work on raw wood, sandpaper is very useful. It is not only necessary for preparing the support but also for removing any mistakes while making the pencil drawing.
Prepare the Wood Support
It is important to emphasize that wood or raw wood is not the only material to pyrograph. You can also use leather. But keep in mind that the latter requires experience for quality pyrography.
It is particularly reserved for professionals. On the other hand, wood carving with a pyrography soldering iron remains achievable even for beginners. If you do not know which material to favor, feel free to check our other article on Which type of wood to choose for pyrography
To simplify the preparation of the support, make sure to choose a smooth surface. If it has defects, proceed to sanding it. Once this phase is finished, clean it properly. Then use a clean cloth to wipe it. Once the raw wood is well dry, move on to the next step.
Trace the Drawing
If the size of the model does not match that of the raw wood support, cut it to the desired dimensions. Then, place it on the intended surface and fix it. You just need to draw on the image with your pencil.
To see the results, lift the tracing paper. In case of errors, sand the marks with sandpaper until the drawing satisfies you. However, avoid rubbing the wood or leather roughly as it may damage it. Since you are eager to know how to use a pyrography pen, the section below gives you precise answers.
Proceed with Pyrography
Before this operation, you must install the tips or nibs. Choose them according to the type of drawing to be made. It is advisable to always use pliers with every handling of the wood pyrography pen to avoid burns.
Once they are properly secured, you can plug in the tool to heat it up. As soon as it reaches the ideal temperature, start pyrographing. To use a pyrography pen like a professional, learn how to hold it correctly. Place it between your thumb and index finger, keeping it vertical.
If you want to vary your creations, you just need to change the tip. The micro tip is perfect for finer lines. However, the universal beveled tip allows you to engrave fine and graphic lines. When you tilt it, it also helps you create thick patterns.
For better results, nothing beats equipping yourself with a high-quality wood pyrography pen. If you have trouble finding one, read our dedicated article on the Dremel pyrography pen
Technical table of pyrography
| Creation step | Recommended action | Visual result obtained |
| Initial sanding | Grit 240 or 400 (ultra-fine) | Smooth surface, perfect tip glide |
| Temperature setting | Low for shading | Subtle gradients and artistic blurs |
| Temperature setting | High for outlines | Deep and sharp black lines |
| Movement | Constant and fluid | Avoids burn spots when stopped |
| Finishing | Matte varnish or beeswax | Protects the pattern without yellowing |
Everything you need to know about using a pyrography pen for your creations
Yes, preparing the wood is an essential step to achieve a clean result. It is recommended to choose light, dry wood without knots, then lightly sand it to smooth the surface. A clean and even surface allows the pyrography pen tip to glide more easily and prevents uneven burns.
The ideal temperature depends on the type of wood and the desired effect. Generally, heating for 5 to 10 minutes is enough to reach the right temperature. For fine and delicate lines, it is better to work at a moderate temperature. For darker areas or shading, the heat can be increased. Some pyrography pens offer temperature control, which allows for more precision.
To avoid excessive burns, move slowly but do not stay too long in the same spot. It is advisable to test the tip on a scrap piece of wood before starting the main design. Additionally, using light and steady pressure helps achieve clean and uniform lines while preserving the surface.