Doing your work in the wrong order can turn a renovation project into a real financial pit due to thermal losses reaching 30%. To avoid sabotaging your comfort, electrical installation before or after insulation must follow a strict chronology ensuring integrity. This guide details methods to embed your conduits according to NF C 15-100 standards and tips to preserve your airtightness without sacrificing the aesthetics of your walls.
- Why electricity before insulation is the golden rule
- Organizing the dance between electrician and plasterer
- Ensuring airtightness under NF C 15-100 standard
- Adapting the strategy between interior and exterior insulation
- Making up for it when insulation is already in place
🗣️ My experience: During my first renovation in 2024, I wanted to rush by installing rock wool before finalizing the outlet layout. I had to tear my insulation panels to pass three forgotten conduits. The lesson? One extra hour of reflection on the electrical plan saves two days of corrective “DIY” and preserves your insulation’s performance.
Why is electricity before insulation the golden rule?
🍀 Advantages of the correct order
- Airtightness preserved
- Considerable time savings
- Easier consuel compliance
🔻 Risks of forgetting
- Insulation damage
- Thermal bridges created
- Increased labor costs
After laying the foundations of your project, it is important to understand why the order of factors radically changes the final product, especially for your thermal comfort.
Preventing thermal bridges and air leaks
Drilling the building envelope afterwards causes invisible but devastating damage. Every hole made in the insulation creates a real thermal breach. Heat then escapes through these weak points.
Warm air inevitably rushes into poorly sealed conduits. This phenomenon generates harmful condensation behind your partitions. Mold quickly ends up appearing. Do you see the problem?
Installing electricity after insulation can cause up to 30% heat loss. This mistake increases your heating bills and promotes structural humidity.
Sabotaged insulation reduces the overall thermal efficiency by 30%. It’s literally money thrown out the window every winter. Your investment thus evaporates uselessly.
Avoid Mechanical Damage to the Insulation
Forcing a conduit behind an already installed panel irreparably tears the material. The insulation then loses its original structure as well as its protective power. The thermal shield becomes a sieve.
A cable crushing the fiberglass removes the precious air bubbles. Yet, it is this trapped air that guarantees your home’s insulation. Without it, the material no longer fulfills its role.
To delve deeper, I recommend reading my guide on Electricity for Dummies which complements this topic well. Discovering how to choose a suitable thermal insulation also provides useful insights for your project. And to go further, knowing how to choose your molly anchor offers interesting guidance for your future drywall fixings.
An insulation compressed by half loses more than 50% of its actual thermal resistance, turning your investment into mere useless filler.
Keeping the insulation intact remains the only guarantee of lasting performance. A torn panel is technically useless for your comfort. The physical integrity of the product is paramount.
Facilitate the Passage of Conduits and Networks
🌍 Did you know?
Warm air can escape through a simple unsealed electrical conduit if it opens into cold attics. This “thermal draft” phenomenon can represent up to 5% additional energy loss in a poorly insulated house.
Working on a bare structure allows you to visualize all the available volume. The electrician then moves freely between the metal studs. It is the ideal time to neatly deploy complex networks.
Without obstacles, the conduits naturally follow the shortest path. This avoids unnecessary bends and frustrating blockages. Pulling the cables then becomes a true child’s play.
The craftsman works twice as fast on a fully open site. This fluidity inevitably reduces your final labor bill. It is a winning strategy for your budget.
⚠️ Common misconception
Thinking that the insulation will “suffocate” the cables. If your installation complies with standards with the correct wire sizes (e.g., 2.5 mm² for outlets), the heating is calculated to be safely dissipated, even when surrounded by insulation. Never undersize your cables for this reason.
Organizing the dance between electrician and plasterer

Once the theoretical order is understood, you need to move to practice and make the craftsmen coexist.
(function(){if(window._alpLd)return;window._alpLd=1;var s=document.createElement(‘script’);s.src=’https://cdn.jsdelivr.net/npm/alpinejs@3/dist/cdn.min.js’;s.defer=true;document.head.appendChild(s);})()Establish a rigorous intervention schedule
Define the key steps. The electrician installs the junction boxes before the insulation arrives. The plasterer only intervenes once the network is tested. This is an immutable logical sequence.
Anticipate reservations. Mark the location of future outlets on the floor. This allows the plasterer to plan their cuts neatly. Nothing should be left to chance.
- Validation of the wiring plan
- Installation of main conduits
- Placement of insulation
- Passing wires into the boxes
- Installation of plasterboard
Propose communication methods. An electrical plan displayed on the wall prevents many errors. Take photos before closing the partitions. It is your life insurance.
Use the technical voids of the metal framework
Explain the role of the rails. The metal studs serve as natural guides. The conduits pass through the perforations provided for this purpose. The structure becomes the skeleton of the network.
Detail the necessary space. A technical void of two centimeters is often sufficient. It separates the insulation from the plasterboard. This protects the cables from the fixing screws. It is a major safety rule.
Specify the fastening techniques. Use cable ties on the studs. The conduits must not float freely.
Integrate plumbing and ventilation networks
Analyze the coexistence. Water pipes and electrical cables often share the space. Direct contact must be avoided. Fire safety depends directly on this.
Present space optimization. Group the networks in vertical technical conduits. This frees up space for insulation. The volume gain is appreciable.
Recall safety distances. Respect a minimum gap between water and electricity. The NF C 15-100 standard is very strict about this. Don’t play with fire.
💡 Practical tip
Take photos of your electrical networks in place with a visible tape measure before installing the insulation and drywall. This visual “as-built plan” will save you from accidentally drilling into a conduit in 5 years when you want to mount a heavy piece of furniture.
Ensuring airtightness under the NF C 15-100 standard
But coordination is not enough; you must also ensure that your installation meets current performance standards.
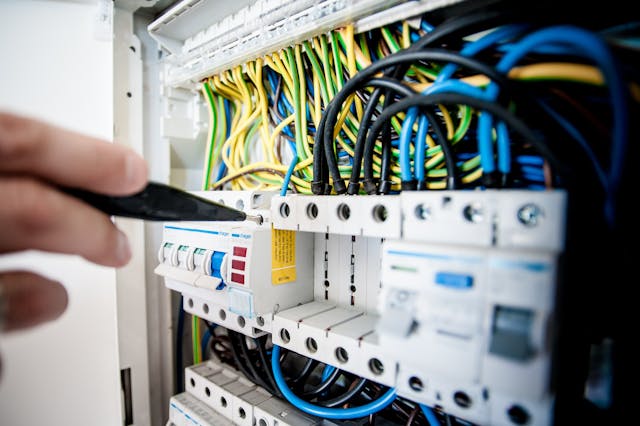
BBC boxes (Low Energy Building) are equipped with flexible membranes that ensure airtightness around electrical conduits to stop air leaks.
Choosing airtight flush-mounted boxes
Airtight boxes are true allies for your insulation. These models have integrated flexible membranes. They perfectly conform to the shape of the electrical conduit.
Air can no longer circulate freely within the partitions. The collar then firmly presses the box against the drywall. It blocks leaks at the cutout.
It’s a detail that makes all the difference for your inspection. A standard box lets too much cold air through. The BBC model is essential.
Treating vapor barrier membrane penetrations
Treating penetrations requires absolute rigor. Each vapor barrier penetration must be carefully taped. Use specific rubber grommets for conduits.
Airtightness must be total and durable over time. The protective film must not suffer any unfortunate tears. A small tear nullifies thermal insulation efforts.
Be extremely meticulous during this technical step. It is the most sensitive point of the worksite. Never cut the film with a cutter without repairing it. Air leaks ruin your bill.
Respecting regulatory box depths
The thickness of the insulation is a valuable data point. A box that is too deep compresses the insulation located just behind it. Choose 40 mm models.
Preserve the thickness of the glass wool as much as possible. The standard requires sufficient volume for connections. Do not overload small boxes with electrical wires.
Electrical safety depends on wiring space. Adapt the box to the thickness of your partition. In internal thermal insulation (ITI), every millimeter counts for insulation. A good compromise is always possible.
| Equipment | Thermal Advantage |
|---|---|
| BBC Box | Eliminates drafts at outlets |
| Rubber grommet | Secures the vapor barrier passage |
| 40 mm Box | Prevents insulation compression |
Adapting the strategy between interior and exterior insulation
The technical challenge changes radically depending on whether you protect your walls from the inside or the outside.
Managing networks in internal thermal insulation
Interior insulation reduces your living space. To limit heat loss, place your outlets wisely. Above all, avoid making unnecessary holes in your exterior walls.
The metal framework creates an ideal technical void for the electrician. Ducts can be slipped in without touching the insulation. This is the cleanest method to simplify the worksite.
Check your old cables before sealing them permanently. A failure after the work would be a real disaster. Replace everything that seems outdated right now.
Anticipate drilling on the facade for exterior insulation (EIFS)
Wall lights and intercoms require special fixings to pass through the thick insulating layer. Be sure to plan these light points before applying the final render.
Water must never infiltrate behind the insulation at the risk of rotting your facade. Use sealing joints around cable exits. This is a major point of vigilance.
There are specific mounting blocks for EIFS that prevent thermal bridges. Attach your equipment to these dedicated supports to ensure the envelope’s performance.
| Criterion | Interior Insulation (ITI) | Exterior Insulation (EIFS) |
|---|---|---|
| Duct location | Internal technical void. | Facade penetration. |
| Risk of thermal bridge | High if pierced. | Low (dedicated supports). |
| Difficulty of modification | Moderate. | High after rendering. |
| Impact on living area | Reduction in m². | No impact. |
Making up for it when insulation is already in place
Sometimes, you arrive too late on a site already insulated, but not all is lost.
Installing technical baseboards and moldings
If your walls are already closed, forget destructive chases. Electrical baseboards offer an elegant and clever alternative. They carefully hide wires without ever damaging the protective insulation.
Use technical baseboards or visible moldings to add outlets without degrading the existing insulation or creating thermal bridges.
The implementation remains disarmingly simple. The ducts are fixed directly onto the drywall to add outlets. It is a clean, quick, and dust-free job. Your thermal performance thus remains completely intact.
An exposed circuit greatly facilitates future maintenance. You can modify your installation without breaking anything in your home. This flexibility proves very valuable for evolving your modern living space.
Reacting to a forgotten duct without breaking everything
A slip-up happens quickly, but retrieval is still possible. Going through the attic often saves the situation. Equip yourself with a flexible pulling needle to descend into the technical void.
If drilling becomes unavoidable, repair it without delay. Sealing sleeves hermetically close the hole around the cable. Never leave a gaping hole, as your comfort depends on it. Be extremely vigilant.
Using an efficient cable detector prevents blind drilling. Precisely identify the metal studs before digging into the wall. Limit your openings to the bare minimum to preserve the building’s integrity.
Plan for scalability with spare conduits
Anticipation is the key to a successful renovation. Always install additional empty conduits in your partitions. Tomorrow’s home automation will inevitably require new wiring. It’s a truly negligible investment.
“Anticipating the future by installing two empty conduits per room costs a few euros today, but will save you thousands of euros tomorrow.”
The electric car is now established as the sustainable standard. Plan now for a large conduit to your garage. Doing this later will cost ten times more. Think about the real estate value.
A smart home must be able to transform smoothly. Spare conduits allow adding options without major work. This is the pinnacle of intelligence applied to renovating your home.
Anticipating your electrical networks before installing insulation prevents 30% of heat loss and guarantees perfect airtightness. Plan this crucial step now to secure your future comfort and sustainably increase your home’s value. An orderly project is the secret to a successful and flawless energy renovation.
FAQ
Is it better to install electricity before or after interior insulation?
The golden rule on a renovation site is clear: electrical installation must absolutely precede the installation of your insulation. This logical sequence allows embedding conduits, making necessary drillings, and positioning boxes without ever damaging the thermal envelope you are creating.
Doing things in the reverse order would be like tearing a brand-new insulating coat to slip cables in, thus creating invisible breaches. By respecting this schedule, you ensure perfect continuity of the insulation and avoid heat losses of up to 30%, thereby protecting your comfort and energy budget.
What are the risks of running electrical cables through already installed insulation?
Drilling or compressing insulation already in place is a risky venture that seriously compromises the efficiency of your home. Every hole made in the material creates a thermal bridge, a true highway for cold, while risking tearing the vapor barrier membrane, which promotes disastrous condensation and mold growth behind your partitions.
Moreover, a cable that crushes mineral wool destroys the precious trapped air bubbles, halving the actual thermal resistance of the material. It is an unintentional sabotage that turns a quality investment into mere ineffective filling, while unnecessarily complicating the electrician’s work.
How to reconcile electrical installation with exterior thermal insulation (ETI)?
In the case of exterior insulation, there is more flexibility for interior networks, but rigorous anticipation remains necessary for the facade. All drillings intended for ventilation, light fixtures, or intercoms must be done before installing the external insulating coat to ensure absolute airtightness and watertightness.
It is crucial to use specific mounting supports and sealing gaskets around cable outlets to prevent any infiltration behind the insulation. Careful preparation helps avoid moisture seeping into the structure, thereby preserving the integrity of your facade in the long term.
Are there solutions if my insulation is already finished?
If you arrive at a site where the walls are already closed, all is not lost, although the solutions are often less aesthetic. The use of technical baseboards or visible ducts allows you to distribute electricity without damaging the insulation, offering valuable flexibility to add outlets without generating dust or thermal bridges.
For localized interventions, the use of airtight flush-mounted boxes and specific sleeves is essential to limit heat leaks. Although more costly and visible, these remedial methods allow you to maintain a certain energy performance while bringing your installation into compliance with the NF C 15-100 standard.
Why does the NF C 15-100 standard impose strict coordination?
Compliance with the NF C 15-100 standard not only ensures your electrical safety but also validates the viability of your overall project. By installing the electricity before the insulation, you allow easy control of circuits, grounding, and safety volumes before everything is permanently hidden by plasterboard.
This coordination between the electrician and the plasterer avoids unpleasant surprises during the Consuel inspection and guarantees that each box has the necessary space without overheating. It is the assurance of a healthy home, where thermal performance and occupant safety coexist in perfect harmony.