Whether outside or inside, walls help dress up the construction. Over time, their condition deteriorates and requires care. Many households plan to undertake their renovation, but some do not know how to go about it.
Whatever your project, the sanding step can prove essential. It provides countless advantages that facilitate the work. Despite common misconceptions, this operation is not as simple as it seems. That is why we have taken care to write this article offering you the best advice. But before going into details, let’s discover in the first part the good reasons to sand the walls.
📋 The essentials at a glance: Personally, I consider sanding the most thankless but most decisive step: 80% of paint finish defects come from a poorly prepared surface. Did you know that careful sanding can reduce paint consumption by 15% by homogenizing the wall’s absorption? I recommend always working with grazing light to spot the slightest roughness before starting.
The importance of sanding before painting
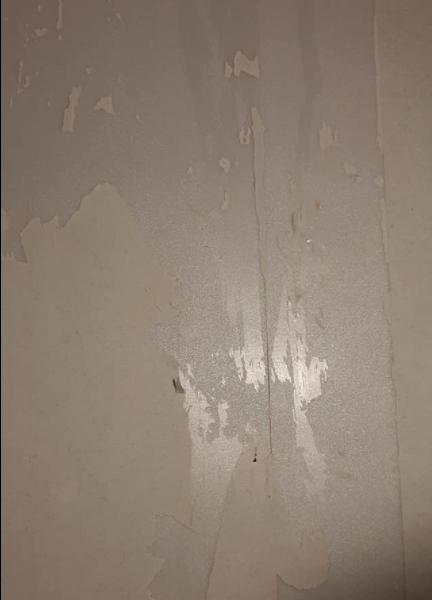
Sanding is a significant step to simplify the application of paint. It allows your surface to become smoother and to avoid slight or small imperfections such as flakes or bubbles.
📍 My experience: In 2025, I wanted to sand my living room ceiling without using a pole sander. After only 20 minutes, my arms were numb and I was covered in a fine white dust despite my mask. The lesson learned is clear: for large surfaces, renting an orbital sander with an integrated vacuum is not a luxury, it is a necessity to preserve your health and achieve a uniform result without exhaustion.
| Aspect | Explanation | Benefit |
|---|---|---|
| Improved adhesion | Sanding makes the surface slightly rough, which allows the paint to grip more easily. | Reduces the risk of flaking or peeling. |
| Smooth surface | Eliminates imperfections, scratches, old layers, or residues. | Ensures a more aesthetic and uniform final finish. |
| Paint durability | By removing unstable or poorly adhered parts, a solid base is prepared. | The paint lasts longer over time. |
| Color uniformity | Sanding homogenizes the surface by removing differences in gloss or absorption. | More consistent and professional tint. |
| Surface cleaning | Removes dust, grease, or other contaminants before application. | Prevents bubbles, marks, or defects after drying. |
To achieve this, it is necessary to level the surface and remove leftover material. Beyond the aesthetic aspect, this work facilitates the adhesion of the new paint. So if you want to succeed in the application and get good results, make sure to prepare the walls by sanding them.
The sanding steps to follow
There are two clearly distinct phases to successfully carry out sanding work.
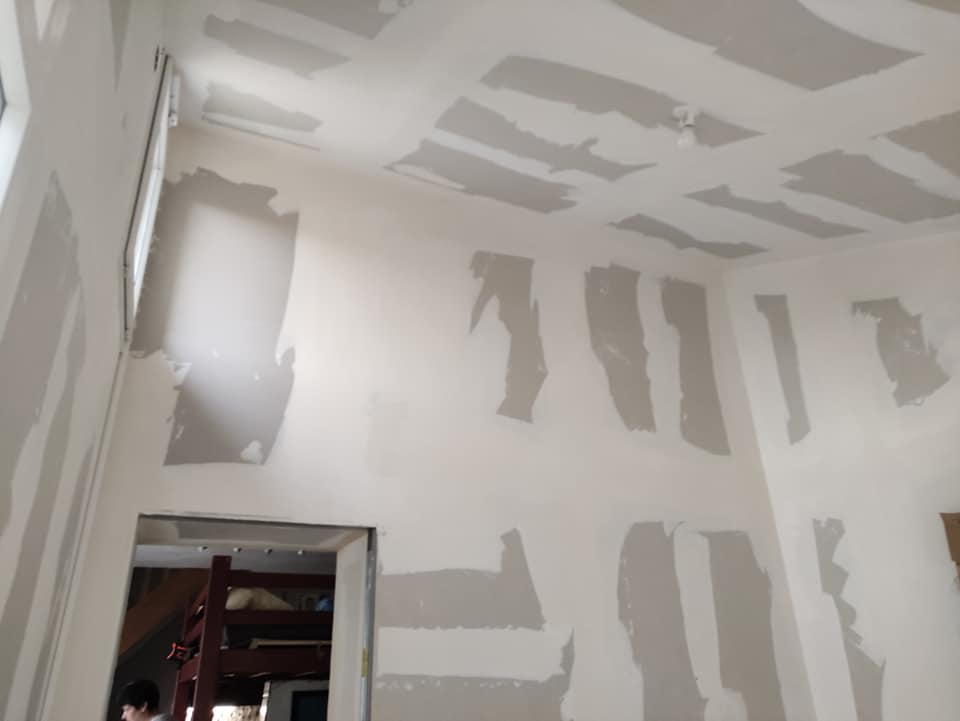
The preparation phase
For your wall sanding to be a success, take the time to prepare the surface. It must have certain qualities to properly and easily accept the paint. It must be not only flat but also clean.
To achieve this, use a cloth or brush to remove all dirt such as cobwebs and dust. Get rid of stains. Once done, let the surface dry for a few minutes.
⚠️ Common trap
The mistake is to start painting just after sanding. Residual dust prevents paint adhesion. It is imperative to wipe the entire surface with a damp cloth or use a vacuum with a soft brush to remove the plaster haze.
The next step is to even out the walls by filling cracks. To do this, consider scraping with a triangular scraper. Then dust off with a damp sponge.
Next, apply a filler on the holes using a putty knife. Once the small defects and roughness disappear, now protect the workspace.
It should be noted that sanding is a really messy task. When you rub the wall, it creates a lot of residue and dust.
It is therefore advisable to equip yourself with a tarp to protect your floor. If you are in a furnished room, do not hesitate to remove the furniture before the operation.
The actual sanding
(function(){if(window._alpLd)return;window._alpLd=1;var s=document.createElement(‘script’);s.src=’https://cdn.jsdelivr.net/npm/alpinejs@3/dist/cdn.min.js’;s.defer=true;document.head.appendChild(s);})()There is no need to be a specialist to carry out this operation. Just follow a few recommendations. It is advised to equip yourself with a quality sandpaper to achieve better finishes. To find the right grit, choose according to the nature of the surface to be worked on.
If it has wallpaper glue or residues, opt for medium grit sandpaper. If the coating is made of tiles, it is better to favor coarse grit sandpaper. This helps you to roughen up properly.
For sanding, start from the top then move down along the surface of your wall. Make circular motions. When the rough sanding is done, replace your sandpaper. Choose a finer grit product. This is perfect for achieving the finish.
Finally, proceed to dust off your walls. Make sure there is no more powder deposit that could interfere with the application of the coating. If necessary, do not hesitate to vacuum the room. This helps avoid dust marks on the walls.
If you choose acrylic paint, you can wash the masonry to degrease it. Don’t forget to let it dry before applying the new coat.
💡 Practical tip
To sand corners without damaging the adjacent wall, use an angle sanding block or simply fold your sandpaper in half. Avoid electric sanders in corners, as they often gouge the plaster too deeply.
The different types of sanders:
There are 4 types of sanders on the market. Each has its own advantages and uses.
- Orbital sander: This device offers movements that are both fast and powerful. It is particularly used for finishing work on flat surfaces, regardless of their size. Likewise, many use it when sanding stair steps or a small piece of furniture. This sander comes with various pads: square, rectangular, or triangular, so you can choose the one that suits you best.
- Belt sander: This machine, on the other hand, is equipped with two rollers. It is notable for its bulky and heavy nature. As such, it is especially designed for sanding large surfaces. If you are looking for finesse, you should pair it with another tool.
- Random orbital sander: This model stands out for its versatility. It allows you to perform countless tasks. It is highly effective for both coarse sanding and finishing. The same goes for polishing or buffing. Some people use it for treating hard materials like concrete. By the way, we invite you to read our other articles: How to sand concrete? You can also consult: How to sand a ceiling?
- Pole sander: As its name suggests, this version of sander is distinguished by its long neck, similar to a giraffe’s. Because of this shape, it is mainly reserved for vertical surfaces. If you plan to sand the tops of walls or ceilings, it is the ideal equipment.
Manual sander or electric sander
Indeed, you are not always obliged to use electric devices to proceed with sanding your walls. It is still possible to choose the manual method.
🌍 Did you know?
Manual sanding should always be done with regular circular motions. If you sand back and forth, you risk creating parallel grooves that will be accentuated by satin or glossy paint.
This requires the strength of your arms using a manual sander, sandpaper, a sanding brush or also a sanding block. However, this solution is only suitable for finishing.
When the wall covering is made of rigid or hard materials, you need to work with a good electric machine. This sander saves you a lot of time and reduces your effort. Finally, consider checking out the advantages of manual sanding:
🍀 Manual Advantages
- Absolute precision
- Ideal for finishing touches
- Low investment cost
🔻 Electric Limitations
- Risk of gouging the surface
- Bulkiness and noise
Frequently Asked Questions
Sanding removes irregularities, old paint traces, or dirt to obtain a smooth surface that will promote better adhesion and a more uniform finish.
Depending on the condition of the wall, you can choose a vibrating sander for finishing or an orbital sander for more versatile work. Manual sandpaper remains an option for small areas.
You need to carefully dust off the surface with a damp cloth or sponge, then let it dry before applying a primer or directly the paint.