Does the bulkiness of metal rails cause you to lose those precious square centimeters that your small bathroom desperately lacks? The rail-free plasterboard formwork stands out as the ingenious solution to optimize space while lightening your material budget. Discover how thin wooden battens or a few adhesive mortar pads guarantee a robust and durable structure for an invisible professional result.
- Why rail-free plasterboard formwork appeals to savvy renovators
- 2 effective techniques to do without metal framework
- Support preparation and rigorous material selection
- How to successfully assemble without rails step by step?
- Finishing secrets for an aesthetic and durable result
- Mastering insulation and humidity to protect your work
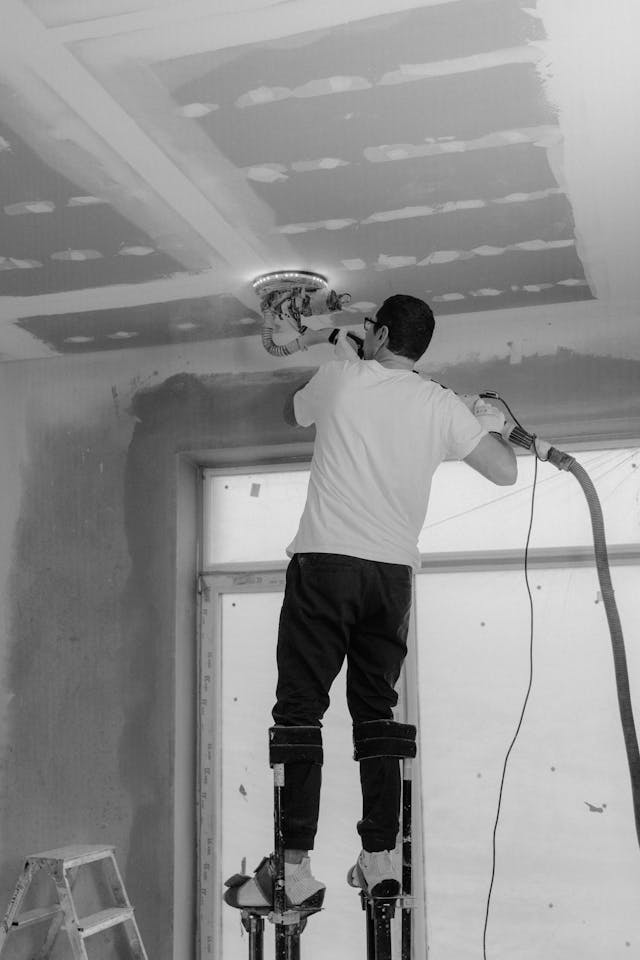
🗣️ My experience: During my renovation in 2025, I had to box in a drain in a tiny WC corner. With rails, I could no longer open the door. I tried bonding with MAP mortar reinforced with concealed wooden battens. The lesson? Rigidity does not come from metal, but from the precision of your cuts and the quality of the corner jointing.
Why does rail-free plasterboard formwork appeal to savvy renovators?
🍀 Advantages
- Record space saving
- Savings on rails and studs
- Finer aesthetics
🔻 Limitations
- Less impact resistance
- Requires meticulous installation
After introducing the idea of simplifying the work, we dive into the heart of the matter by exploring the concrete benefits of abandoning metal rails.
Substantial space gain in small areas
A classic 48mm framework, combined with the board, quickly eats up space. In contrast, the rail-free installation uses thin 1 cm battens. This recovers precious centimeters on technical ducts or pipe boxing.
The aesthetics benefit greatly as the structure becomes slimmer. It then integrates with absolute discretion. This is a major asset for minimalist finishes in old apartments where every nook counts.
In a small bathroom, gaining five centimeters on a formwork completely changes the circulation around the sink.
Real savings on the material budget
Removing studs and rails significantly reduces the bill. You avoid buying drywall-metal screws and resilient strips. The overall budget is thus significantly reduced.
The money saved can be invested elsewhere. You can choose a high-performance adhesive mortar or perfectly dry wooden battens.
Logistics also become child’s play. Less material means less transport and handling. This is an advantage when renovating a floor alone without an elevator.
This method remains unbeatable for small budgets. The profitability is immediate.
Ease of installation for DIY enthusiasts
The technical accessibility here is impressive. No need for a nibbling tool or complex crimper. A simple cutter and a ruler are enough to start the work without stress.
You save a lot of time by skipping the rail shimming. Direct fixing on battens allows you to progress quickly. It is ideal on flat and healthy surfaces.
Making a sturdy drywall formwork without rails brings real pride. The result is solid. The structure does not move over time.
The site is much quieter. You avoid the screeching metal cuts.
To deepen your renovation techniques, I recommend consulting my guide for filling with MAP which complements this subject well. Learning to make a perfect calicot installation also provides useful tips for your corners. And to go further, knowing how to sand a wall offers interesting insight into finishes.
2 powerful techniques to do without metal framing
Now that the advantages are clear, let’s see how to concretely fix your panels without using a single metal rail.
Direct fixing with adhesive mortar spots
🌍 Did you know?
MAP (Adhesive Mortar for Drywall) has a pull-off strength of several hundred kilos per m2. It is this bonding power that allows completely dispensing with metal rails for small vertical works.
The principle of MAP is simple. Adhesive mortar spots are applied directly on the substrate or on the back of the panel. It is the preferred method for masonry walls.
The spacing of the anchor points is crucial. About thirty centimeters should be respected between each spot to ensure rigidity. Double gluing on the edges reinforces the holding of the corners.
This technique works on brick, cinder block, or concrete. However, be careful with painted surfaces which require a bonding primer. This prevents any future detachment of your plasterboard formwork without rails.
Light framework with thin wooden battens
The wooden alternative is appealing. Thin battens are used, about ten to fifteen millimeters thick. They are anchored to the wall to create a rigid frame. It is ideal when the wall is not perfectly straight.
The plasterboard is screwed directly into the wood with standard screws. This method offers excellent mechanical resistance. It is perfectly suitable for formworks subject to slight daily vibrations.
These few millimeters of space create a technical void. Thin electrical cables can be passed through it. It is a clever solution to neatly hide a spotlight power supply.
Comparison of resistances according to the nature of the wall
Each wall imposes its specific fixing constraint. The analysis of the holding is therefore an essential preliminary step.
| Support | Recommended technique | Main advantage | Risk |
|---|---|---|---|
| Concrete/Brick | MAP | Strong adhesion | Humidity |
| Old plaster | Battens | Solidity | Crumbling |
| Wood | Direct screwing | Simplicity | Wood movement |
| Irregular wall | Thick MAP | Correction | Product consumption |
Preparation of the substrate and rigorous selection of materials
Before taking out the glue or the screwdriver, careful preparation guarantees that your formwork will not end up crooked.
Precise marking and plumb verification
The laser level becomes your preferred partner for this crucial step. Draw perfectly sharp lines on the floor and then on the ceiling to delimit the exact footprint of your future work.
Equip yourself with a mason’s ruler to check the verticality of the supporting wall. If the wall leans, you will simply have to adjust the thickness of the adhesive mortar spots to compensate for this lack of plumb.
Measure the ceiling height scrupulously at different points of the marking. This anticipation allows you to prepare your cuts on the floor, thus limiting waste and laborious adjustments during installation.
⚠️ Warning
Trying to glue plasterboard on a glossy alkyd paint or a dusty substrate without primer. Without perfect adhesion, your formwork risks detaching from the wall over time, creating large cracks at the joints.
Select BA13 panels suited to each room
For your kitchen or bathroom projects, the green water-resistant board is essential. It withstands ambient condensation and prevents the cardboard from prematurely molding due to moisture.
If the goal is to mask noisy drains, prefer the blue board. Its higher density acts as an effective acoustic shield, muffling the sound of water flow during the night.
In high-traffic areas like a hallway, favor a high hardness board. It withstands daily impacts without flinching, whether from a vacuum cleaner hit or repeated rubbing of bags.
Green board (water-resistant) for humidity, blue board (soundproof) for pipe noises, and high hardness board
The list of tools for a clean job site
A cutter with new blades and a drywall rasp remain essential. These tools allow you to adjust each edge with surgical precision.
Prepare your equipment for an efficient assembly:
- Drywall screwdriver with a disengageable bit
- Adhesive mortar mixer
- Clean trough
- Wide spatula
- Precise spirit level
- Manual board wedge
Protect your floor with a tarp and keep the vacuum cleaner within reach. Working in a clean environment allows you to maintain perfect visibility.
How to successfully install without rails step by step?
💡 Practical tip
To hold your boards while the glue dries, use high-strength masking tape or temporary wedges. The adhesive allows you to clamp the corners at 90° without needing to screw into a structure.
The equipment is ready and the support is marked, it’s time to move on to the actual installation.
For a drywall formwork without rails that stands the test of time, the trick lies in using 1 cm thick wooden battens or adhesive mortar (MAP) spots for an unwavering hold.
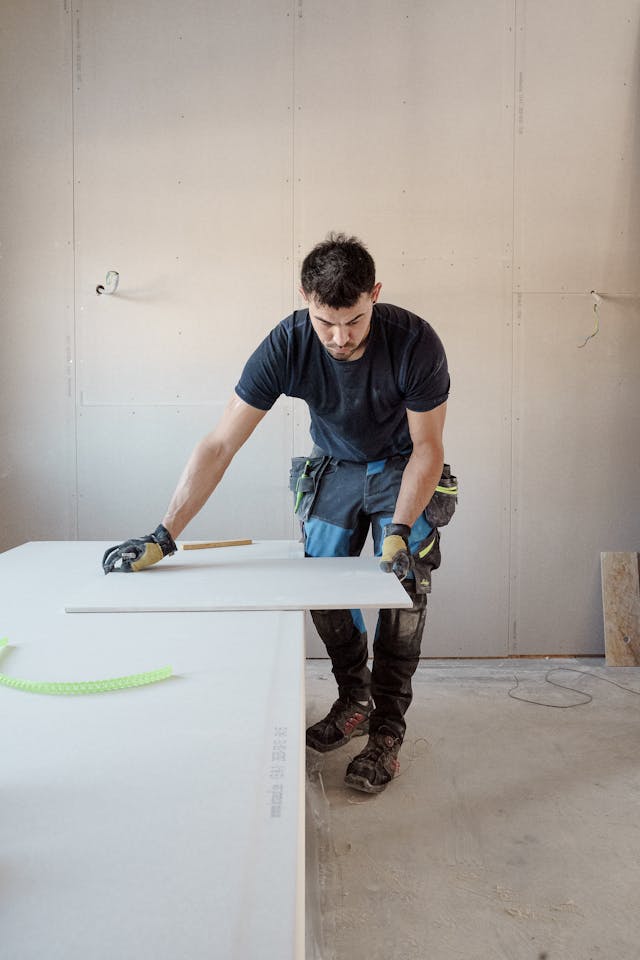
Cutting the boards with surgical precision
Lay the board flat. Score the cardboard with the cutter following your ruler. Lift the board and give a sharp snap to break the plaster. Finally, cut the cardboard on the other side.
Use the rasp to smooth the edge. A clean edge greatly facilitates the making of subsequent joints. Never neglect this dry sanding step.
Present the board dry-fit against the wall. It must fit perfectly without forcing against the ceiling or floor.
Fix the supports and screw the facings
Apply glue spots or fix your wooden battens. For the MAP, press the board firmly against the wall while checking the plumb with your ruler.
Use floor shims to hold the panel during the adhesive setting. If you screw into wood, space the screws twenty-five centimeters apart along the edges.
The screw head should be flush without piercing the cardboard. If it goes in too deep, the fastening holds nothing. A special drywall bit easily solves this problem.
| Action | Tool / Material |
|---|---|
| Cutting | Utility knife and surform rasp |
| Support | Wood battens (1cm) or MAP (adhesive mortar) |
| Fastening | Drywall screws or direct pressure |
Correcting defects of an uneven wall
If the wall is bulging, adjust the thickness of the adhesive mortar. You can place larger spots in hollow areas to level the final surface.
Insert small wooden shims behind the battens if necessary. This allows you to straighten a wooden structure on a wall that “bulges” or flares out.
Run a two-meter straightedge over the entire framework. No gap should appear between the straightedge and the panel. This is the secret to a professional and straight finish.
(function(){if(window._alpLd)return;window._alpLd=1;var s=document.createElement(‘script’);s.src=’https://cdn.jsdelivr.net/npm/alpinejs@3/dist/cdn.min.js’;s.defer=true;document.head.appendChild(s);})()Finishing secrets for an aesthetic and durable result
Once the structure is installed, the finishing step transforms your technical assembly into an invisible decorative element.
Achieving joints and corners without cracks
Generously fill the joints with a specific filler. Apply your paper or mesh tape on the protruding corners. Press firmly with the knife to remove air bubbles.
Wait for complete drying before sanding. Use a fine grit to avoid scratching the cardboard. A second smoothing coat is often necessary for perfection.
In recessed corners, an acrylic sealant can absorb micro-movements. This prevents premature paint cracking due to temperature variations or building vibrations.
Integrating a discreet and secure access hatch
A framework should never block access to shut-off valves or meters. The access hatch allows quick intervention in case of water leaks.
Cut the opening to the hatch dimensions. Fix the aluminum frame directly into the drywall. Screw it carefully so it does not move when opened.
Choose a “tileable” or “paintable” model for total discretion. Once finished, only a thin rectangular slit reveals the presence of the technical access in your beautiful framework.
Reinforcing the structure to fix a light shelf
If you plan to fix a load, place a wooden reinforcement behind the panel before gluing.
- Use of expansion anchors like Molly bolts
- Respect the maximum load of 5kg without reinforcement
- Drilling without percussion
- Manual screwing to avoid stripping the thread
A framework without rails remains fragile. Avoid hanging heavy objects such as a television or a large mirror on it.
Maximum load of 5kg without specific reinforcement. Do not attach heavy objects (TV, large mirror). Use Molly anchors and screw manually.
Master insulation and humidity to protect your work
Finally, let’s not forget the thermal and sanitary aspects, as a poorly designed casing can become a nest of problems.
Manage humidity and condensation risks
Stagnant air behind a casing of cold pipes can condense. This promotes the appearance of invisible mold that degrades indoor air quality and the substrate. Be vigilant about this point.
Leave a small gap at the top and bottom or install a discreet ventilation grille. This allows maintaining a dry airflow behind your plasterboard panels. It is essential.
Humidity is the silent enemy of plasterboard; without minimal air circulation, your casing risks disintegrating.
Insert a thin insulation behind the casing
Use a reflective thin insulation to gain comfort without losing space. Attach it between the wooden battens or staple it directly before installing the panel. It is perfect for cold walls. This trick saves your living volume.
Make sure to leave a small air gap on each side of the material. This precaution optimizes thermal efficiency and avoids direct contact with possible wall moisture. The assembly thus remains healthy.
Even a small thickness reduces the feeling of a cold surface. It is a welcome plus for the comfort of the renovated room. You will feel the difference.
Treat thermal bridges and joints
Angles are often areas of heat loss. Apply a sealing strip at contact points between the casing and the existing peripheral walls. Do not neglect these critical joints.
Ensure that the insulation of the casing connects with that of the main wall. Avoid holes or breaks that create cold spots conducive to localized mold. Continuity is the key to success.
A bead of silicone sealant around the perimeter improves airtightness. It is a technical detail that makes a difference on the heating bill and overall durability. Your plasterboard casing without rails will then be exemplary.
This clever method using spots of adhesive mortar (MAP) or thin 1 cm battens guarantees precious space saving and lasting robustness. Prepare your cuts now to transform your volumes with agility. Mastering your casing without metal framing becomes the secret of an elegant, economical, and perfectly integrated renovation.
FAQ
Is it really feasible to install plasterboard without using metal rails?
Absolutely, this bold approach is not only possible but particularly wise for small-scale projects or tight spaces. By substituting traditional rails with thin wooden battens or using adhesive mortar (MAP), one can build robust structures while optimizing every available square centimeter.
This alternative method, favored by clever renovators, allows one to do without the sometimes bulky thickness of a traditional metal framework. Testimonials also confirm that an assembly carried out with care demonstrates exemplary stability, defying time without the slightest deterioration after several years.
Which technique should be preferred to fix plasterboard sheets on wooden battens?
The secret to a lasting installation lies in the choice of wooden battens, ideally with a thickness of about 10 mm to 28 mm, firmly anchored to the supporting wall. To prevent the wood from splitting during assembly, it is often recommended to use calibrated battens and to screw the boards directly into the wood with 35 mm drywall screws, ensuring a spacing of 40 to 50 cm.
For increased safety and flawless rigidity, applying spots of adhesive mortar (MAP) on the back of the boards, in addition to screwing onto the battens, is a formidable trick. This double fastening guarantees perfect adhesion, turning your casing into a wall as immobile as a stone wall.
How to create an effective technical cavity without a metal framework?
The use of battens offers remarkable flexibility to arrange a discreet technical cavity, essential for routing electrical conduits or small plumbing. By laying the battens flat, a sufficient space is created to hide the networks without having to pierce the vapor barrier, thus preserving the thermal integrity of the dwelling.
In the context of seeking acoustic comfort, it is quite possible to opt for slightly wider battens. These allow the insertion of sound insulation between the wood before laying the final covering, thus offering a protective barrier against noise nuisances while maintaining an incomparable finesse of execution.
Can adhesive mortar be sufficient for a long casing?
On surfaces up to 3.6 meters, direct bonding with spots of MAP is a perfectly viable solution, provided the supporting wall is sound and dry. This “bonded doubling” technique eliminates the need for any intermediate structure, whether metal or wood, thus radically simplifying the site logistics.
However, caution remains necessary: the solidity of the whole depends exclusively on the quality of the adhesion. For irregular walls or areas requiring subsequent object fixing, adding mechanically fixed battens remains the safest strategy to guarantee the durability of the work against everyday hazards.