
📋 Key points: Personally, I believe that replacing a self-piercing valve with a classic T-connector reduces the risk of long-term leaks by 90%. My opinion is that this operation is accessible to everyone, provided the tubing is well prepared. This is an essential step to reliably secure your plumbing installation over the long term.
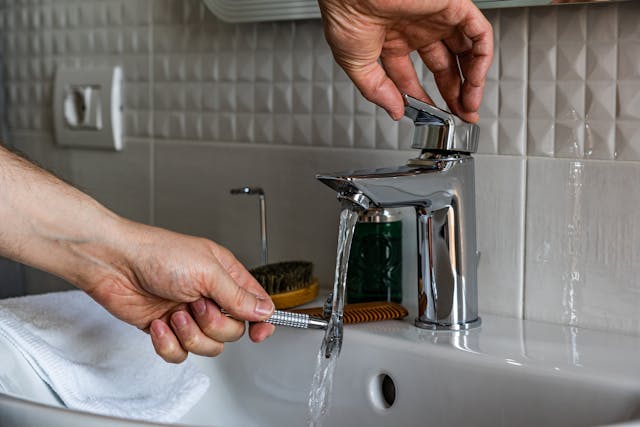
The replacement of a self-piercing valve is an operation accessible to any DIYer, even beginners. This type of valve, used to quickly supply appliances like a washing machine or refrigerator, allows connection without soldering or major modification of the existing network. Installing or replacing a self-piercing valve however requires adherence to certain key steps, rigorous preparation, and particular attention to safety standards as well as sealing.
🎒 On the ground: During a repair in 2023 at a friend’s place, I had to intervene on a self-piercing valve that had been leaking for months behind a washing machine. The copper pipe was so oxidized to the point of perforation that 5 cm of pipe had to be cut. The lesson learned is simple: never wait for a micro-leak to appear before switching to a permanent fitting.
Why choose a self-piercing valve for your daily needs?
👍 Strengths
- Permanent sealing
- Better water flow
- Facilitated maintenance
🔍 Drawbacks
- Requires shutting off the water
- Needs some tools
A self-piercing valve is appreciated for its ease of installation, especially in homes where no dedicated branch was planned during the original layout. Its principle is based on the ability to pierce the pipe at the time of installation, thus avoiding the need for soldering or specific copper tools.
Choosing this device saves you time and limits the risk of errors on your existing installation. In case of a water leak, it is usually enough to retighten or replace the valve’s gasket, without having to rethink the entire supply line.
For more details, I recommend you consult my article on how to replace a self-piercing valve with the right tools. If you suddenly find yourself with no hot water overnight, it may also be due to a valve issue. And to go further, knowing how to remove excess grout will help you with finishing around the sink.
Preparation before replacement: necessary tools and safety measures
(function(){if(window._alpLd)return;window._alpLd=1;var s=document.createElement(‘script’);s.src=’https://cdn.jsdelivr.net/npm/alpinejs@3/dist/cdn.min.js’;s.defer=true;document.head.appendChild(s);})()Before starting the self-piercing valve replacement, gather all the necessary tools to work efficiently and safely. Strict adherence to the following steps greatly reduces the risk of water leaks or poor sealing.
- Open-end wrench or adjustable pliers
- Screwdriver suitable (flat or Phillips depending on the model)
- Teflon tape to ensure the sealing of the threading
- Container to collect any water drops during disassembly
- Clean cloth to wipe surfaces and seals
💡 Tip
Always have two adjustable wrenches: one to hold the fitting in place and the other to tighten the nut. This prevents twisting the copper pipe when pressurizing.
Always remember to turn off the water before starting the operation. This step is essential to avoid any risk of flooding during the disassembly of the old faucet.
Identifying the shut-off point, whether it is a local or main shut-off valve, is an essential reflex. After this first safety measure, proceed with the partial draining of the circuit where the new device will be installed to eliminate residual pressure.
Detailed steps to replace a self-piercing valve
🌍 Did you know?
A dripping faucet leak can waste up to 4 liters of water per hour, about 35 cubic meters per year. Replacing an aging self-piercing system is therefore also an ecological and economical gesture.
Several actions follow one another to successfully carry out the self-piercing valve replacement. The order and precision of each step ensure a smooth intervention and durable use of the new equipment.
How to disassemble the old valve?
The disassembly of the old self-piercing valve begins by removing the clamp that firmly holds the device to the water supply pipe. This metal support, usually screwed or clamped around the tube, also holds the valve seal responsible for ensuring tightness.
Loosen the clamp gradually using the wrench or pliers, then carefully remove the valve from its housing. Inspect the conduit to check that no debris remains and carefully clean any residues before continuing the intervention.
How to position and align the new self-piercing valve?
Positioning the new self-piercing valve starts with choosing the right spot on the pipeline. Ideally, reuse the same point as before, unless the condition of the tube requires moving it. A precise alignment of the piercing mechanism is essential to successfully install the self-piercing valve and minimize the risk of damaging the pipe.
Place the valve seal between the clamp and the tube, then secure the clamp ensuring it perfectly fits the curvature of the pipeline. Tighten each screw methodically to immobilize the assembly without crushing the seal, a crucial step to prevent any future water leaks.
How to finalize the installation and ensure tightness?
Screw the faucet body until you feel a clear resistance, indicating that the tip is correctly piercing the tube wall. Turn slowly to avoid damaging the inner pipe. Apply Teflon tape on all exposed threads to enhance sealing and create an additional leak-proof barrier.
Gently operate the opening mechanism to test water flow and check for any seepage around the seals or the mounting flange. If necessary, adjust the flange tightening and correct the installation of the faucet seal. This check eliminates most potential sources of water leaks after a self-piercing faucet replacement.
⚠️ Warning
A common mistake is not deburring the inside of the tube after cutting. Small copper shavings can travel into your new faucet and damage the ceramic seals or clog the filters.
Common mistakes when replacing a self-piercing faucet
Rushing is one of the main pitfalls during self-piercing faucet replacement. Often, poor alignment of the piercing mechanism results in incorrect passage through the tube, subsequently causing micro-leaks that are difficult to detect.
Using an inappropriate or worn faucet seal also causes noticeable issues. Always opt for a new seal compatible with the tube diameter to secure your self-piercing faucet installation over time.
Tips for long-term maintenance and reliability
Regular maintenance ensures the sealing and durability of the self-piercing faucet. Every six months, check the tightening of the mounting flange and the condition of the faucet seal to anticipate any water leaks.
Remember to clean access areas and, if you notice unusual marks or corrosion, immediately replace the affected part. A quick replacement prevents more serious damage and avoids premature wear of the supporting tube.
| Elements to check | Recommended frequency | Corrective actions |
|---|---|---|
| Flange tightening | every 6 months | moderately retighten if necessary |
| Seal condition | annually | replace if cracked or crushed |
| No water leaks | after each handling | retighten or reinstall |
Frequently asked questions about replacing a self-piercing faucet
What is the average time to replace a self-piercing tap?
Replacing a self-piercing tap generally takes between 20 and 45 minutes, depending on your experience and the accessibility of the pipe. Good preparation beforehand, especially gathering the necessary tools, greatly speeds up the process.
- Removing the old one: about 10 minutes
- Installing the new one: 15 to 30 minutes including alignment and leak testing
What are the risks of improper installation of a self-piercing tap?
Defects in self-piercing tap installation increase the risk of water leaks, persistent moisture behind the cabinet, or even damage to the pierced pipe. An incorrect alignment of the piercing mechanism can cause cracks or prevent normal water flow to the connected appliance.
- Continuous leak around the tap seal
- Poor penetration of the tip into the pipe
- Premature corrosion due to repeated infiltration
Can the location of an old self-piercing tap be reused?
The location can be kept if the tube is neither deformed nor corroded. It is then advisable to thoroughly clean the area and replace the tap seal before the new installation. However, some prefer to slightly move the location to strengthen the mounting.
- Inspect the tube to check for absence of rust
- Clean with a cloth and lightly sand if necessary
- Systematic replacement of the tap seal
What are the signs of a water leak after replacing a self-piercing tap?
Drops are quickly observed under the mounting flange, a slow drip at the tap seal, or localized moisture on the adjacent wall. These are signs of a sealing defect or poor tightening.
- Recurring droplets under the tap
- Wet spots around the support
- Occasional pressure drop on the supplied appliance
| Symptoms | Likely Causes |
|---|---|
| Continuous drops | Seal improperly positioned |
| Persistent moisture | Flanges poorly tightened |
Publications similaires :
 Best Shredders: Reviews and Comparison 2026
 Rubber bands: an essential element
 Designing a balcony: our professional tips
 Mastering the installation of rails for partition walls with plasterboard sheets
 How to choose sustainable tableware for the home?
 How much does an entrance door cost: understanding prices and choosing according to your budget