The installation of rails is an essential step in interior construction or renovation when deciding to install plasterboard partitions. Whether it’s to create a new space, optimize acoustic insulation, or simply add a touch of modernity to your interior, understanding the mounting techniques is crucial.
📋 The essentials at a glance: Personally, I believe that the success of a partition depends 90% on the squaring of the metal framework. An error of only 2 mm on the floor can turn into a displacement of several centimeters at the ceiling. I recommend always using a rotary laser to ensure perfect verticality of your studs before screwing the boards.
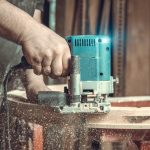
Necessary tools and materials
To successfully carry out the installation of rails, it is essential to equip yourself with the right materials. The efficiency of the metal structure will largely depend on the quality of the tools used. A precise measuring device, for example, will allow you to obtain clean and suitable cuts for each rail.
Among the essential tools are the spirit level, the drill-driver, and the hammer. The choice of materials is just as important. You will need to provide screws suitable for fixing the rails to the floor and ceiling, as well as studs that will hold the plasterboard sheets.
📍 My experience: During my first project in 2024, I forgot to place the resilient strip under my starter rail. Result: every vibration of the door resonated throughout the house. I had to dismantle 6 meters of partition to correct this 15-euro detail. The lesson learned is that acoustic insulation starts under the rail, not within the thickness of the wall.
Complete list of supplies
- Spirit level
- Tape measure
- Drill-driver
- Screwdriver
- Utility knife
- Metal rails
- Vertical studs
- Plasterboard sheets
- Appropriate screws
- Protective mat
| Component | Main use | Standard spacing | Type of screw |
|---|---|---|---|
| Rail R48 | Floor and ceiling fixing | 60 cm (fixing) | 6×40 punched |
| Stud M48 | Vertical structure | 60 cm (40 cm if tiling) | TRPF 13 mm |
| Resilient strip | Sound insulation | Under the rails | Self-adhesive |
| Splice plate | Stud connection | N/A | Crimping |
Steps to create an effective metal structure
(function(){if(window._alpLd)return;window._alpLd=1;var s=document.createElement(‘script’);s.src=’https://cdn.jsdelivr.net/npm/alpinejs@3/dist/cdn.min.js’;s.defer=true;document.head.appendChild(s);})()Preparation of the Floor and Ceiling
First of all, the surface must be cleaned to ensure perfect adhesion of the metal rails. This starts by marking on the floor and ceiling the exact location of the future drywall partition. To do this, use a chalk line which will provide a clear reference on both planes.
Ensuring that the floor and ceiling are flat is essential, as this will facilitate the positioning of the studs and furring channels later. Use a spirit level to check for irregularities and correct them if necessary before fixing the rails.
Installation of Horizontal Rails
⚠️ Common Mistake
The classic mistake is to mark on the floor without checking alignment with the existing door frames. Always remember to check the total thickness (rail + 2 boards) so that your partition aligns flush with your door frames.
Once the marking is done, start by laying the first rails on the floor. To ensure strength and stability, opt for anchor fixings when necessary, especially in load-bearing walls. Repeat the operation for the rail fixed to the ceiling, using appropriate screws.
Make sure to leave a slight tolerance between the edges of each rail laid to allow the materials to expand due to thermal variations without affecting the overall metal structure.
Positioning of Vertical Studs
The vertical studs are then inserted into the rails. Their spacing should be optimized according to the dimensions of the drywall sheets, often around 60 cm to provide good support. Carefully placing these elements ensures not only the robustness of the metal framework but also ease during the subsequent mounting of the boards.
Be sure to securely fasten each stud with specific screws to prevent any potential slipping and to ensure their perfect alignment. It can be helpful here to use a straightedge or another long tool to check the verticality of the studs.
🌍 Did You Know?
The galvanized steel of the rails is 100% recyclable and infinitely so. Using metal profiles rather than wooden battens also reduces the risks of deformation related to residual moisture in buildings.
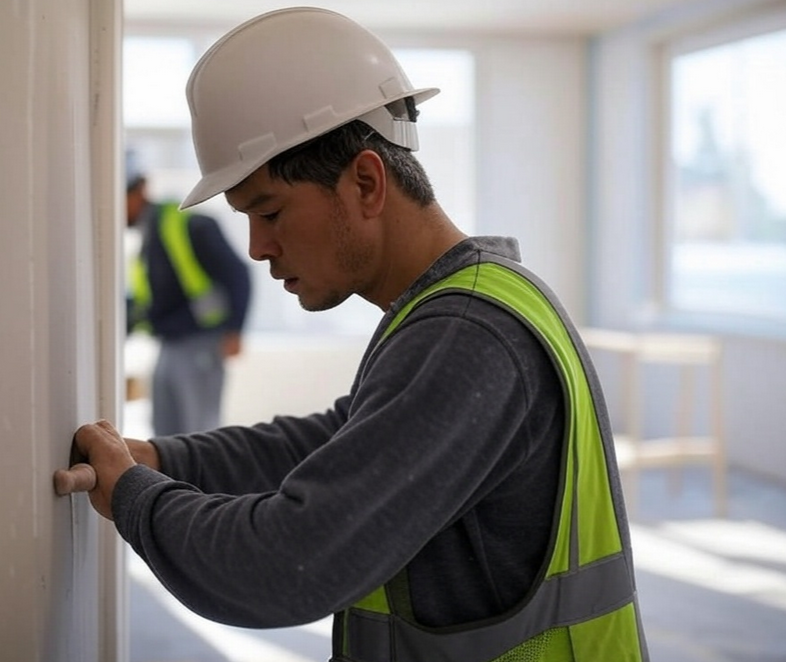
Fixing Drywall Sheets to the Metal Structure
At this stage, the boards are fixed onto the already assembled framework. It is important to respect a certain spacing between screws, generally recommended by the manufacturer, to avoid weakening the board while ensuring it is firmly held against the structure.
Always start from the bottom and proceed progressively and horizontally. This method avoids placing an unnecessarily heavy load on a specific area of the framework.
🔧 Tip
Cut your vertical studs 1 cm shorter than the actual ceiling height. This facilitates their fitting into the rails and prevents the structure from being put under tension during the natural settling of the building.
Precautions to Take
When installing the panels, remember to check that they do not touch the floor or ceiling to avoid moisture rising and warping. Shims can be temporarily placed to maintain this spacing during installation.
Furthermore, when working on a self-supporting ceiling, double your vigilance on the suspension systems to achieve a perfect finish without any visible distortion.
Do not hesitate to consider this comparison between metal framing and wood:
🌟 Advantages
- Perfect flatness guaranteed
- Lightweight and easy to cut
- Simplified duct passage
🔻 Limitations
- Requires specific tools
- Sharp edges (gloves mandatory)
Insulation and doubling of the partition
One of the primary purposes of this type of partition is often to optimize thermal and sound insulation. Inserting an insulating material between the studs is therefore strongly recommended if this is your goal.
Common materials include glass wool and expanded polystyrene, although there are more ecological versions on the market, such as wood fiber. This choice will have a direct impact on the comfort of your home by reducing unwanted noise and heat loss.
Doubling and finishes
For a flawless aesthetic, consider doubling by installing a second layer of plasterboard panels. This not only strengthens the wall’s solidity and improves its insulation performance but also provides a smooth surface ready to be painted or wallpapered.
Do not forget to apply a joint compound between each panel to prevent future cracking, then gently sand these areas before starting the final decoration.
Frequently asked questions about installing rails for partitions
<!– wp:yoast/faq-block {"questions":[{"id":"faq-question-1741796667489","question":"What materials should be chosen for the metal structure?","answer":"Generally, galvanized steel is preferred for its corrosion resistance and durability. However, make sure that the rails and studs you choose are compatible with the type of panels planned. Particular attention to the thicknesses of the materials is recommended to ensure proper structuring.","images":[],"jsonQuestion":"What materials should be chosen for the metal structure?","jsonAnswer":"Generally, galvanized steel is preferred for its corrosion resistance and durability. However, make sure that the rails and studs you choose are compatible with the type of panels planned. Particular attention to the thicknesses of the materials is recommended to ensure proper structuring.","jsonImageSrc":""},{"id":"faq-question-1741796670848","question":"How to determine the right height for my partitions?","answer":"The height of a partition mainly depends on the ceiling height and the intended use. Measure from the floor to the ceiling to determine the size of the panels and adjust the studs. Don't forget to take into account the thickness of any floor coverings for a harmonious integration.","images":[],"jsonQuestion":"How to determine the right height for my partitions?","jsonAnswer":"The height of a partition mainly depends on the ceiling height and the intended use. Measure from the floor to the ceiling to determine the size of the panels and adjust the studs. Don't forget to take into account the thickness of any floor coverings for a harmonious integration.","jsonImageSrc":""},{"id":"faq-question-1741796674455","question":"Should a self-supporting ceiling be added for certain partitions?","answer":"In some cases, especially for fairly wide rooms where directly supporting the partition would be difficult, a self-supporting ceiling is ideal. It offers better weight distribution and avoids unnecessary stresses on the main structure. Make sure to follow the manufacturer’s recommendations for the correct installation of the hangers.”,”images”:[],”jsonQuestion”:”Should a self-supporting ceiling be added for certain partitions?”,”jsonAnswer”:”In some cases, especially for fairly wide rooms where directly supporting the partition would be difficult, a self-supporting ceiling is ideal. It offers better weight distribution and avoids unnecessary stresses on the main structure. Make sure to follow the manufacturer’s recommendations for the correct installation of the hangers.”,”jsonImageSrc”:””},{“id”:”faq-question-1741796678751″,”question”:”What is the optimal spacing for studs and furring channels?”,”answer”:”The standard spacing between studs is generally 60 cm, which corresponds to the usual width of plasterboard panels. However, for projects requiring particular reinforcement – such as load-bearing walls or partitions supporting equipment – reducing this spacing to 40 cm might be wise.”,”images”:[],”jsonQuestion”:”What is the optimal spacing for studs and furring channels?”,”jsonAnswer”:”The standard spacing between studs is generally 60 cm, which corresponds to the usual width of plasterboard panels. However, for projects requiring particular reinforcement – such as load-bearing walls or partitions supporting equipment – reducing this spacing to 40 cm might be wise.”,”jsonImageSrc”:””}]} –>Generally, galvanized steel is preferred for its corrosion resistance and durability. However, make sure that the rails and studs you choose are compatible with the type of panels planned. Particular attention to the thicknesses of the materials is recommended to ensure proper structuring.
The height of a partition mainly depends on the ceiling height and the intended use. Measure from the floor to the ceiling to determine the size of the panels and adjust the studs. Don’t forget to take into account the thickness of any floor coverings for a harmonious integration.
In some cases, especially for fairly wide rooms where directly supporting the partition would be difficult, a self-supporting ceiling is ideal. It offers better weight distribution and avoids unnecessary stresses on the main structure. Make sure to follow the manufacturer’s recommendations for the correct installation of the hangers.
The standard spacing between studs is generally 60 cm, which corresponds to the usual width of plasterboard panels. However, for projects requiring particular reinforcement – such as load-bearing walls or partitions supporting equipment – reducing this spacing to 40 cm might be wise.