Parquet flooring remains one of the most trendy coverings to date. It can be found everywhere, whether in the kitchen, living room, or bedroom. Even better, it comes in many varieties that suit all tastes and all types of floors.
Despite its many advantages, it deteriorates over time and with prolonged use. To restore it, you can properly sand your parquet to bring back all its shine. Otherwise, it is also possible to cover it with a new coat of paint.
If this last option appeals to you, this article provides essential information on the subject. But before giving you details, it is important to mention the good reasons for staining this type of flooring.
📋 Key points: Personally, I consider staining your parquet the most effective method to change the ambiance of a room without replacing the flooring, as it highlights the wood grain on 100% of the treated surface. It is a meticulous job that requires perfect preparation of the substrate. A well-chosen stain can transform a classic oak into a contemporary or exotic floor in just a few coats.
Why stain parquet flooring?
👍 Strengths
- Infinite customization
- Enhances the wood
- Economical solution
🔍 Considerations
- Sanding required
- Delicate application
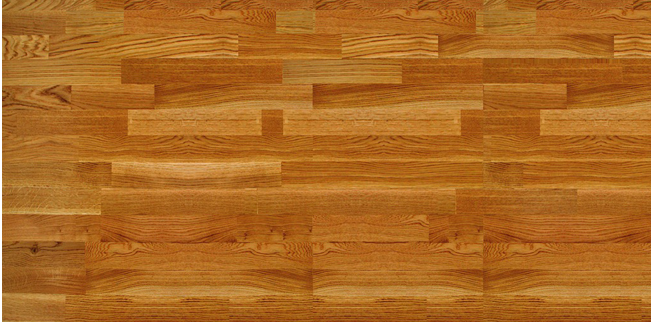
Parquet flooring brings a unique charm to a room. Unlike tiles, it transforms an interior into a cozy little nest that warms the atmosphere.
However, if you prefer Scandinavian decor, you must admit that the wood tends to be duller or darker. To adapt it to this style, it becomes necessary to change its color. Staining your floor updates it while preserving the warmth of the material.
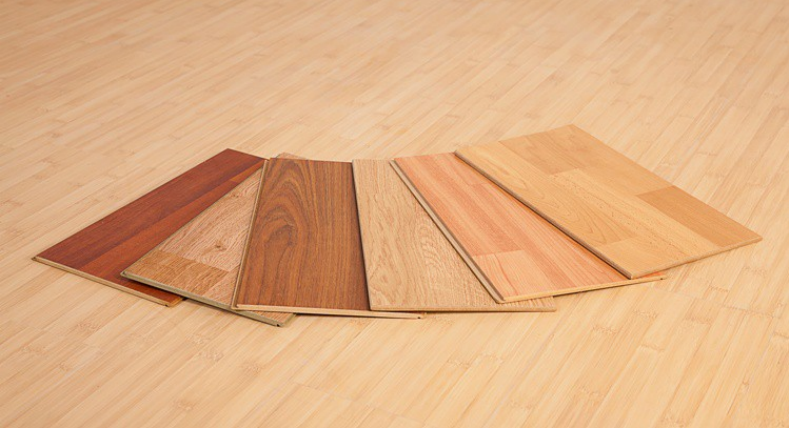
Since there is a wide variety of shades, you can choose the one that suits the overall decor. Moreover, options exist for both hard and soft wood.
🌍 Did you know?
The final sanding with 120 grit is crucial: if you sand too finely (180 grit or more), you risk “glazing” the wood, which will prevent the stain from penetrating evenly into the fibers.
During renovation work, homeowners prefer to apply tiles for ceiling and wall and often neglect the floor. However, changing its look is an excellent idea to bring originality to a classic interior.
Whether you opt for graphic decoration, a glossy parquet, or a dark one, this flooring is capable of immediately catching all eyes.
For an open kitchen connected to the living room or dining room, staining the parquet effectively delineates the two spaces. You can paint the kitchen floor with a tile-effect parquet and the other with a brighter color. This allows marking the areas in different styles.
📍 My experience: During a project in 2025, I wanted to stain a floor without doing a preliminary test on a scrap piece. The wood absorbed the stain unevenly, creating dark spots impossible to fix without completely sanding the 15 m2. The lesson is simple: each wood species reacts differently, always do a test in a hidden corner to validate absorption and final color.
What types of floor stains are available on the market?
- Brown stain: For the classics, brown, beige, and golden stains are among the best-known options. Timeless and enduring, the first suits almost every room in the house.
- Beige stain: As for the second, it is a better choice to bring brightness.
- Golden stain: The golden shade highlights the floor with its unmatched charm.
- White stain: If you like stained floors, white, gray, and black are among the most favored colors by interior architects. They choose the first to create a clean and modern decoration. To achieve a contrasting effect, do not hesitate to pair it with warm-toned furniture.
- Gray stain: Gray adds a touch of refinement and elegance to the room.
- Black stain: Regarding black floors, they show remarkable originality especially in large contemporary-style rooms.
⚠️ Warning
A common mistake is using a water-based varnish on a water-based stain without precautions. This can “rewet” the stain and create color streaks. Use a sealing primer between the stain and the finish to block the pigments.
How to choose the stain that best suits my floor?
For an overall color harmony, multiple parameters must be considered, namely the shade of the walls and furniture, the ceiling height, and the size of the room.
The floor stain must contrast with or complement the other decorative elements in the house. It should not have the same tone as the furniture or partitions.
If you plan to add floors to existing ones, their color must be consistent to maintain the flow of the house. Avoid applying opaque-toned floors in a small room. They also do not harmonize with dark walls.
If the room has a low ceiling, a bright floor is a better choice. Gray or white, it visually enlarges the space.
If you want to highlight the furniture, favor a dull-colored floor. It brings out their charm. If your goal is to hide scratches or small dents, opt for a matte finish.
In professional environments, dare to use bold and deep-toned floors. Red is perfect in offices or commercial spaces. However, if you prefer a classic style in your bedroom, the natural wood color will suit you perfectly.
How to prepare the floor before staining?
Do you want to add character to your interiors? Staining a floor is an interesting solution. First of all, it is crucial to properly prepare the floor to achieve good results.
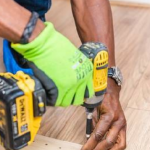
Since it must be clean before treatment, the first step is to vacuum it. Work following the direction of the floor installation. Be sure to wear your gloves and mask for your protection.
For an old floor, restore it first. When it is waxed, remove the old wax using a wax remover. Do the same with any other finish such as oil or varnish.
| Preparation steps | Description | Necessary tools | Precautions to take |
|---|---|---|---|
| 1. Cleaning the floor | Remove dust, stains, and greasy residues to obtain a clean surface. | Vacuum Wet mop Mild degreaser | Avoid overly abrasive products Let dry completely before moving to the next step |
| 2. Sanding the floor | Remove the old finish (varnish, wax, paint) and smooth the surface for better stain adhesion. | Electric sander Sandpaper (grit 40 to 120) Dust mask | Work in the direction of the wood Do not insist too long on one area to avoid hollows |
| 3. Vacuuming residues | Remove all dust generated by sanding to avoid application defects. | Powerful vacuum Microfiber cloth | Focus on corners and joints Do not use a damp cloth at this stage |
| 4. Repairing imperfections | Fill cracks, holes, or irregularities for a uniform finish. | Wood filler Spatula Fine sandpaper | Let the filler dry before sanding Choose a filler shade close to the wood |
| 5. Stain test | Apply the stain on a small area to check the final result. | Brush or cloth Stain sample | Test on a less visible area Respect drying time before evaluating the color |
If the floor is stained, use a wood stain remover. When it is nailed, all nails must be removed. Otherwise, it is better to hammer them in.
If cracks or holes appear, use a wood filler to fill them. If you notice damaged planks, they must be replaced.
During the preparation of the surface, it is also possible to sand it. If it is not bare on all sides, the finish will not be uniform. Use a sander with coarse-grit sandpaper. Then finish sanding with fine-grit paper.
The last phase is to clean the floor with a damp sponge. It must be perfectly dry before staining.
How to apply stain on the floor?
(function(){if(window._alpLd)return;window._alpLd=1;var s=document.createElement(‘script’);s.src=’https://cdn.jsdelivr.net/npm/alpinejs@3/dist/cdn.min.js’;s.defer=true;document.head.appendChild(s);})()Before starting, it is strongly recommended to ventilate the room well. Also, be sure to follow the manufacturer’s instructions to the letter. Each product indeed has its own particularities.
That said, now prepare the stain. You can mix it and then pour it into a container. Start from the perimeter of the room using a flat brush. Always work in the direction of the floorboards.
To spread the stain over the surface, use a quality roller. Make sure it is fully loaded with product.
After 2 minutes, you can wipe it off using a single-disc floor machine equipped with a beige or white pad. It is also feasible to use a lint-free cotton cloth. When it becomes saturated, it must be replaced.
Respect the drying time, which is generally indicated on the product. It is often recommended to repeat the operation 2 or 3 times. To apply each layer, simply repeat all the steps mentioned above.
💡 Practical tip
To achieve a lighter shade than that of the can, do not use water (which could raise the fibers), but use a “colorless base” or a specific thinner provided by the manufacturer.
How to avoid stains and scratches when applying stain on the parquet floor?
There is no need to be a professional handyman to prevent marks or traces from appearing during the application of the stain.
To carry it out properly, it is essential to use the right tool. As a rule, the manufacturer mentions in the instructions the most suitable instrument for this application.
A simple clean, lint-free cloth, a spray gun, a brush, and a paintbrush are among the equipment most recommended by manufacturers. When used properly, no scratches or stains can appear.
During the application of the product, it is advised to follow the wood grain. This also helps you avoid marks.
Try to adhere to the number of coats and drying time. You can easily find this information often in the manual.
How to ensure that the stain is applied evenly on the parquet floor?
For the product to be applied uniformly on the floor, it is recommended to carefully follow a few steps. The first phase is to proceed with bare sanding of the surface. After cleaning it, let it dry completely.
You can then apply the stain on the parquet with the tool intended for this purpose. If the manufacturer recommends a brush, a paintbrush, or even a spray gun, you must follow the instructions.
Once done, make sure to apply the product strictly following the direction of the wood grain. Otherwise, the final result will not meet your expectations. This instruction applies whether it is the first, second, or third coat.
Take the time to read the manufacturer’s advice on drying time. The product must dry completely before applying a finishing coat. Otherwise, it affects the aesthetic quality of the floor.
How to add patterns or decorative effects using stain?
During interior renovation, many questions arise. What type of parquet to choose for your kitchen? Which pattern to choose for the dining room floor covering? The goal is generally to change the style of the room to make it original.
Fortunately, there are many ideas to modernize the parquet decor. Graphic patterns are among them and remain very trendy. For example, you can place a nice square in the middle of the room, outlined by a darker or lighter shade.
For those who like the modern look, they can opt for geometric patterns. Some sublimely provide a touch of floor tiling. You can also find floral decorations and stripes with two contrasting paint shades.
Frequently Asked Questions
<!– wp:yoast/faq-block {"questions":[{"id":"faq-question-1682038093870","question":"How to protect stained parquet from scratches and future damage?","answer":"It is advisable to use felt pads to protect the floor from scratches caused by furniture. Also, avoid plastic wheeled chairs as they often damage the parquet.”,”images”:[],”jsonQuestion”:”How to protect stained parquet from scratches and future damage?”,”jsonAnswer”:”It is advisable to use felt pads to protect the floor from scratches caused by furniture. Also, avoid plastic wheeled chairs as they often damage the parquet.”,”jsonImageSrc”:””},{“id”:”faq-question-1682038097427″,”question”:”How to maintain stained parquet to preserve its beauty and durability?”,”answer”:”Stained parquet is easy to maintain. A few drops of dishwashing liquid are enough to keep it shining over time. For oiled parquet, the use of black soap is recommended. If the floor is coated with a layer of varnish, use a reviving product to restore its shine.”,”images”:[],”jsonQuestion”:”How to maintain stained parquet to preserve its beauty and durability?”,”jsonAnswer”:”Stained parquet is easy to maintain. A few drops of dishwashing liquid are enough to keep it shining over time. For oiled parquet, the use of black soap is recommended. If the floor is coated with a layer of varnish, use a reviving product to restore its shine.”,”jsonImageSrc”:””}]} –>It is advisable to use felt pads to protect the floor from scratches caused by furniture. Also, avoid plastic wheeled chairs as they often damage the parquet.
Stained parquet is easy to maintain. A few drops of dishwashing liquid are enough to keep it shining over time. For oiled parquet, the use of black soap is recommended. If the floor is coated with a layer of varnish, use a reviving product to restore its shine.