When moving into a new apartment, one often wonders which furniture to choose for their home. To reduce expenses, it is possible to renovate old furniture.
If the latter is painted or varnished wood, you need to strip it to bring back its shine. The use of a stripper is necessary. However, this product is completely unsuitable for waxed surfaces.
To restore them, they must be dewaxed. Before getting to the heart of the matter, let’s summarize in a few points the importance of this makeover step.
📋 Key points: Personally, I consider dewaxing furniture to be the most rewarding step in restoration, as it allows you to rediscover the original look of the wood sometimes hidden by 50 years of accumulated layers. It is a delicate operation that requires patience to avoid scratching the fibers. By using the right products, you give your furniture a new lease on life while preparing it for a new durable finish.
Why dewax a piece of furniture?
Whether it is a table, a cupboard, a chest, a shelf, or a wardrobe, old wooden furniture is highly sought after nowadays. Moreover, the taste for vintage continues to gain ground. But that’s not all, wood is trendy because it brings life and a warm atmosphere to an interior.

But over the years, this noble material loses its shine and its color becomes somewhat dull. To give it a second life, all the ingrained dirt must be removed.
📍 My experience: During the restoration of an antique dresser in 2025, I made the mistake of wanting to sand directly over the old wax. The heat from sanding melted the wax, which immediately clogged my abrasive discs, rendering them unusable in 30 seconds. The lesson is clear: always dewax chemically or mechanically with cold methods before considering any finishing sanding.
For waxed furniture, it is imperative to dewax it before renovating. When aged, layers of wax keep accumulating, not to mention stains.
So, these must be removed, including the layers of products applied on them. This step facilitates the application of a new layer of wax, paint, or varnish on the furniture.
🍀 Advantages
- Restores the natural grain
- Ensures paint adhesion
- Avoids intensive sanding
🔻 Limitations
- Often odorous products
- Messy work
What are the common methods to dewax a piece of furniture?
To properly sand your parquet flooring, many techniques are possible. But it is practical to use a parquet sander.
⚠️ Common Mistake
The classic mistake is to rub perpendicular to the wood grain with steel wool. This creates permanent micro-scratches that will stand out harshly under a new stain. Always work strictly in the direction of the grain.
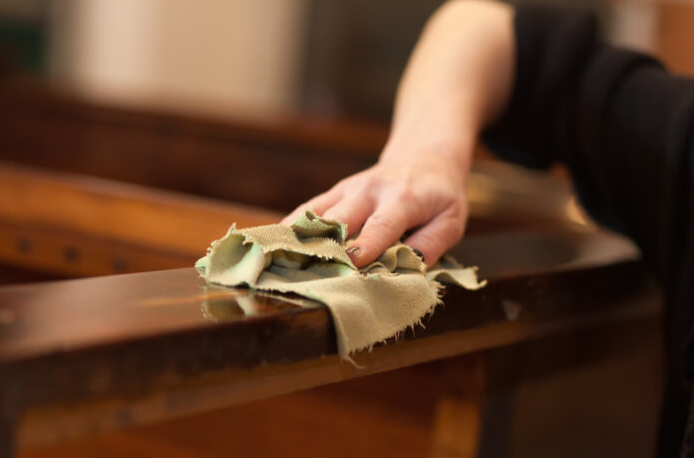
- Use a wax remover: There is nothing better than using a product called wax remover. To apply it on wooden surfaces, you just need to make a uniform layer with a cotton cloth. Try to respect the direction of the wood grain.
- Use turpentine: Besides that, the use of turpentine is well known for removing wax from a table or a cabinet.
- Apply vinegar: Similarly, vinegar can prove effective. If this natural tip interests you, you can apply it directly on the wood with a cloth soaked in the substance.
- Use Saint-Marc detergent: If you are still looking for other methods, Saint-Marc detergent can also do the job. It is important to respect the dosage well to get good results.
- Clean with bleach: To remove stubborn stains, you also have the option to clean the wooden surface with bleach.
- Sand with sandpaper: If the dirt seems too deep, using sandpaper is necessary.
- Restore with wood filler: It should be noted that the method of waxing removal from furniture mainly depends on its condition. If it is too damaged, it must be restored with wood filler after waxing removal, which avoids marks. Also, remember to fill cracks.
🌍 Did you know?
Natural beeswax never really dries completely. It remains ‘alive’ and continues to capture dust and air pollutants, which explains why an unwaxed piece of furniture ends up becoming sticky over the years.
What equipment is needed to effectively remove wax from furniture?
Just like sanding a wall before painting, a few tools are essential to remove wax from a wooden object properly.
While chemical products are often heavily criticized, most prefer natural solutions. If you are one of them, use baking soda and vinegar. The first simplifies sanding the furniture while the second preserves fragile surfaces.
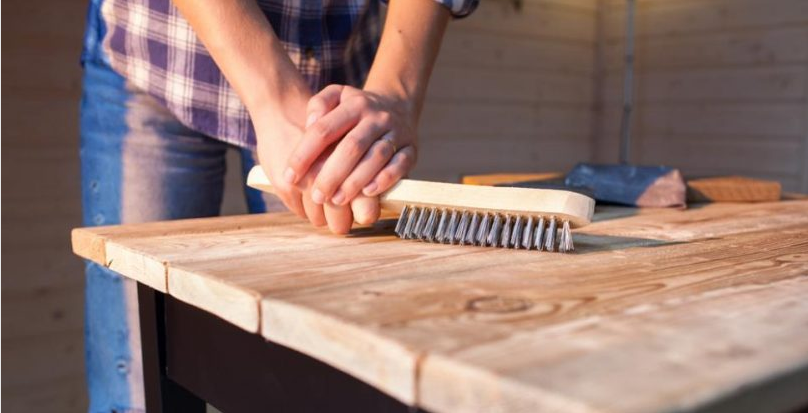
The use of a stripping brush is necessary to easily remove the old layer of wax. If the wax seems thick, you can get rid of it with a scraper.
If natural solutions do not convince you, the wax remover is easy to use. To apply it, you need a cotton cloth, preferably lint-free. Moreover, this article has shown how to wax a piece of furniture. For more information, feel free to consult it.
🔧 Tip
For carved corners or moldings, use an old toothbrush or a soft brass brush soaked in wax remover. This helps extract the wax lodged in the crevices without damaging the ornamental details.
How to prepare the furniture for waxing removal before the process?
Whether it concerns cleaning, stripping, or waxing removal, you should always start by properly preparing the furniture. Assess its condition to plan the work to be done. Make sure it is perfectly even and clean.
With a cleaning cloth, think about dusting and cleaning it using a soft cloth. Ideally, use a cotton fabric. Thanks to this, lint is unlikely to stick to the furniture. Do your best to remove all dirt.
After cleaning, you need to be patient because the surfaces must be dry. Once done, you can start the wax removal.
What chemical products are used to remove wax from furniture and are they dangerous?
As a general rule, the wax removers available on the market pose no threat to your health. Nevertheless, it is crucial to remain cautious to avoid the worst.
Consider reading the product instructions before use. This helps you know the components. Manufacturers often mention safety precautions there.
If you decide to use turpentine, it is strongly recommended to equip yourself with protective gear such as gloves and appropriate goggles.
To avoid damaging your lungs, remember to ventilate well the room where you will work. Recall that this extract contains toxic substances.
The same applies to bleach. According to reliable sources, it can be corrosive. It can therefore burn or irritate the eyes or skin.
To avoid this, wear special gloves before handling it. Also do not forget goggles and a mask. This substance can emit toxic gases once mixed with certain chemicals.
How to know if furniture needs waxing removal before being repainted or varnished?
No matter the type of wax you used on your furniture, this product leaves traces and accumulates over time. As a result, your stool, table, or wardrobe gradually loses its color and original condition. When the item fades, it is time to remove the wax.
But before starting, first make sure it is really waxed, not coated with a layer of paint or varnish.
To do this, use a cloth and some denatured alcohol. Rub a corner and if the piece of fabric becomes sticky and brown, the furniture is waxed. Otherwise, it is varnished furniture.
How to choose the right product to remove wax depending on the type of wood and the condition of the furniture?
There are many effective elements that remove wax layers from furniture. Since chemical products sometimes seem aggressive, many people prefer natural solutions.
Talcum powder is actually part of it. It helps to remove excess wax. Also, the mixture of baking soda and white vinegar adds shine to wooden surfaces.
| Type of wood | Condition of the furniture | Recommended product | Application advice |
|---|---|---|---|
| Softwood (pine, fir) | Lightly soiled | Mild wax remover or white vinegar | Apply with a cotton cloth following the grain direction |
| Hardwood (oak, beech) | Deeply waxed | Turpentine or Saint-Marc detergent | Use the product in the right amount and rinse with clear water after use |
| Exotic wood (teak, mahogany) | Old or greasy waxing | Specific wax remover for exotic woods | Test on a small area before full application |
| Varnished or treated wood | With stubborn stains | Diluted bleach or sandpaper | Use carefully to avoid damaging the finish |
| Damaged or cracked wood | Heavily damaged | Wax remover + wood filler | Remove wax first, then fill cracks before finishing |
If the furniture is too dirty or damaged, it is better to opt for a wax remover. Use a cotton cloth to apply it while rubbing in the direction of the wood grain.
After drying, fill holes or cracks using a wood filler or wood putty. This step is necessary before sanding the furniture. Choose a putty whose color is close to the wax to avoid any difference in shade.
What is the recommended drying time after wax removal and before finishing?
To give your wooden furniture a fresh look, some rules must be considered. Drying time is among the important criteria.
You must patiently wait 10 to 12 hours after applying a wax remover and before applying new wax or a coat of paint. The wood does not necessarily need sunlight to dry. It simply needs ambient air.
Once you respect this duration, it guarantees good adhesion of the product to the wooden surface and ensures the quality of the finish.
Speeding up the steps is therefore not a better idea even if you do not have much time. Furniture maintenance should not be done hastily.
(function(){if(window._alpLd)return;window._alpLd=1;var s=document.createElement(‘script’);s.src=’https://cdn.jsdelivr.net/npm/alpinejs@3/dist/cdn.min.js’;s.defer=true;document.head.appendChild(s);})()What are common mistakes to avoid when removing wax from furniture?
As mentioned above, it is important to let the wooden surface dry in the open air before finishing. Otherwise, the new paint or wax will not adhere properly to the surface.
During wax removal, there is often a tendency to rush things. As a result, one is tempted to pour the wax remover product directly over the entire piece of furniture to save time.
However, this is a mistake because you will not get the result up to your expectations. Moreover, it may damage the wood. You need to proceed in small areas.
To do this, apply the wax remover on a cloth and then rub a limited and precise area. Once this step is done, wipe to avoid damaging the furniture. Continue this action until you cover the entire surface.
Frequently Asked Questions
To ensure a flawless result, some furniture requires sanding. The goal is to make them smooth to facilitate the application of a layer of wax, varnish, or paint.
Putting a tarp on the workspace is not necessarily required. But for the floor, it is better to cover it with kraft paper or newspaper to protect it.